Apache’s prime strength is its customizability and flexibility. Apache comes with the support for a large number of modules to perform few web serving tasks that itself cannot fulfill. One such module gaining popularity in recent times is Google’s mod_pagespeed that makes the website load much faster than ever. It does this by applying filters to a variety of files like HTML, CSS, JavaScript, Jpeg, Png, Gif etc., in order to :
- Reduce the number of trips the browser has to make to grab what it needs.
- Reduce the size of those files and to optimize the length those files are cached.
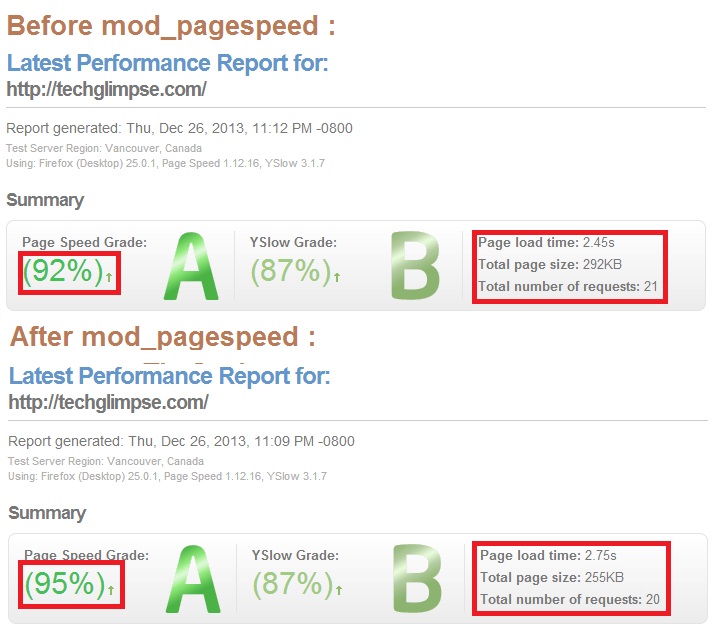
We have implemented mod_pagespeed on our server and found tremendous improvement in loading time. Below image shows you the comparison before and after enabling mod_pagespeed. We were able to achieve a 3% increase in page speed grade, reduction in page load time, page size and total no. of request to the server! We recommend all the webmaster to use mod_pagespeed to automatically optimize web pages to improve better performance while serving web pages using Apache HTTP server.

Install mod_pagespeed module for Apache:
Supported platforms for mod_pagespeed module
- CentOS/Fedora/RHEL (32-bit and 64-bit)
- Debian/Ubuntu (32-bit and 64-bit)
Note: If you are using Nginx instead of Apache, then mod_pagespeed module should be built from source.
Configure Google Repository for mod_pagespeed module
To install mod_pagespeed module using yum, we need to use Google’s repository, so as to enable your system to install and get regular updates automatically. Here is how you can add the repository to your system:
Create a file mod-pagespeed.repo under /etc/yum.repos.d/ with the help of your favorite editor and add the following lines of code to it based on your OS Architecture.
32-Bit – RHEL/CentOS/Fedora
[mod-pagespeed]
name=mod-pagespeed
baseurl=http://dl.google.com/linux/mod-pagespeed/rpm/stable/i386
enabled=1
gpgcheck=1
64-Bit – RHEL/CentOS/Fedora
[mod-pagespeed]
name=mod-pagespeed
baseurl=http://dl.google.com/linux/mod-pagespeed/rpm/stable/x86_64
enabled=1
gpgcheck=1
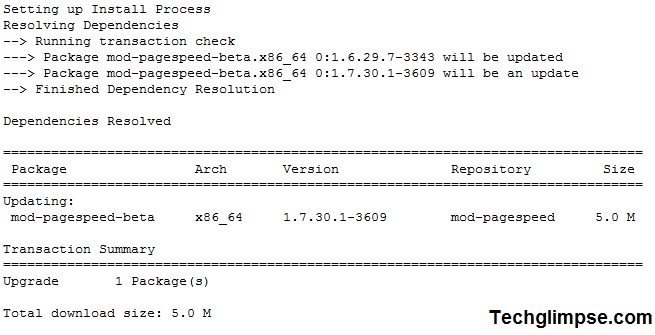
Installing mod_pagespeed Module using yum
We shall use Yum(Learn how to configure yum) to install mod_pagespeed module from the above created repository.
Fri Dec 27 /etc/yum.repos.d>$yum --enablerepo=mod-pagespeed install -y mod-pagespeed

Do not forget to restart the httpd service:
/etc/init.d/httpd restart
Configure mod_pagespeed module to turn ON/OFF
By default, mod_pagespeed is automatically Turned On. If you want to turn off for development purposes then open file : /etc/httpd/conf.d/pagespeed.conf using your favorite editor and look for the below line :
ModPagespeed on
and change it to
ModPagespeed off
Do not forget to restart the httpd service:
/etc/init.d/httpd restart
How to upgrade mod_pagespeed Module using yum
To upgrade from a previous version, use the standard yum or apt-get update commands. For example:
Fri Dec 27 /etc/cron.daily>$yum update mod-pagespeed
Do not forget to restart the httpd service:
/etc/init.d/httpd restart
How to verify mod_pagespeed Module for apache
Create a phpinfo.php file under apache root directory with the following lines of code to it.
<?php
    phpinfo ();
?>
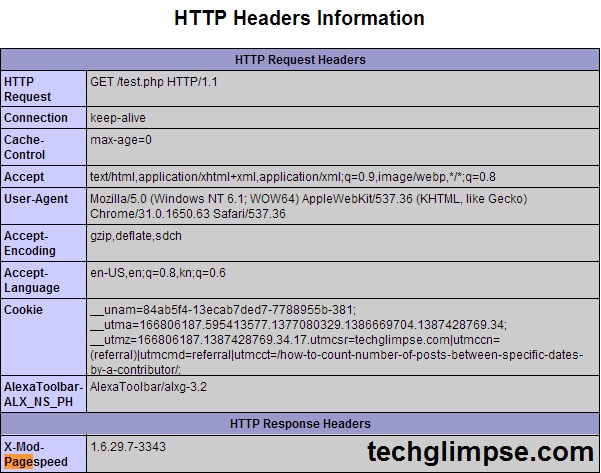
Once you created the above file, access the file phpinfo.php by navigating to your web browser like http://localhost/phpinfo.php. You will see “X-Mod-Pagespeed” section in the HTTP header, similar to below:


