Question: I have been running cron on a Linux server to take a backup of my website once in a day. But I download those backups to my local machine (which is Windows) once in a week or so. Is it possible to automate file transfer from Linux to Windows?
Answer:
Yes, you can. Take a look at WinSCP’s Scripting and Automation feature.
In this tutorial, I’ll be explaining how to write a batch script to automate file transfer between Linux and Windows using WinSCP and then schedule the script using Task Scheduler in Windows.
Assumptions: I assume that the SSH server is running on a Linux machine and the local machine is Windows 10.
Writing Batch Script to Automate File Transfer from Linux to Windows
Did I say writing a batch script? I didn’t mean actually, instead we will be using WinSCP to generate the batch script.
Step 1: Launch WinSCP application.
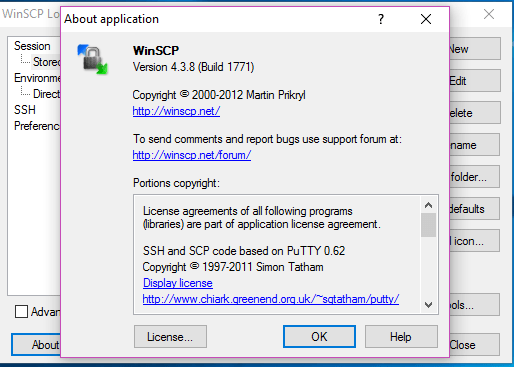
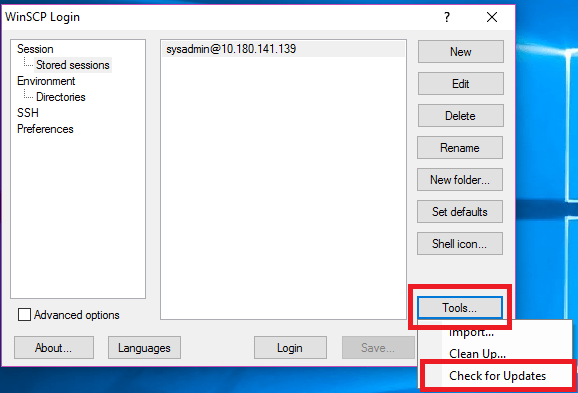
Step 2: First of all, check the version of WinSCP
Step 3: If you are using a older version of WinSCP, then you need to download and install the latest version.
Step 4: Launch WinSCP after installing the latest version.
Step 5: Login to Linux machine (remote) by enter the necessary details such as IP address, username and password.
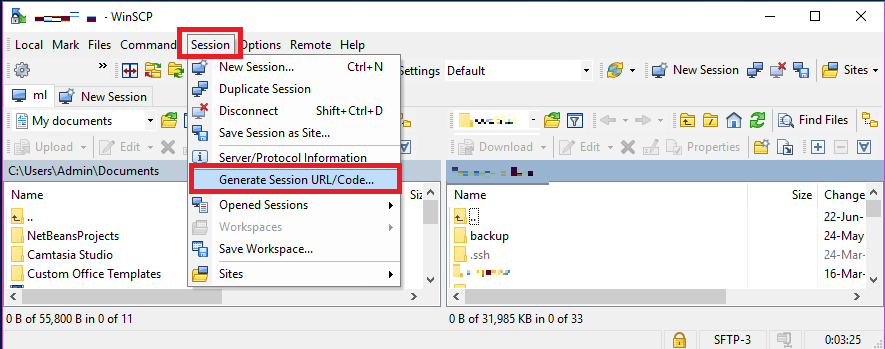
Step 6: Upon successful login, click Session > Generate Session URL/Code from the menu.
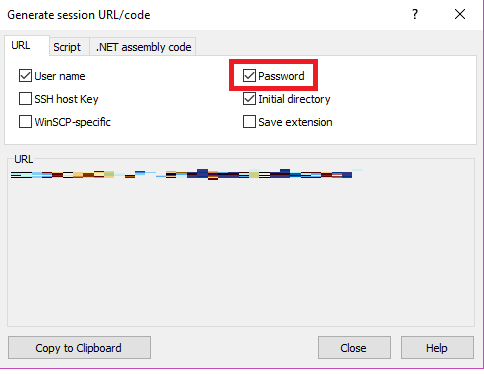
Step 7: In the “Generate Session URL/code” dialog, lookout for “Password” check box. If it’s disabled, you need to enable it for automating the file transfer. To do that, you need to save the session with necessary username and password.
Caution: It’s not advised to save the password, but if you want to automatically login and transfer files, then you need to save the password.
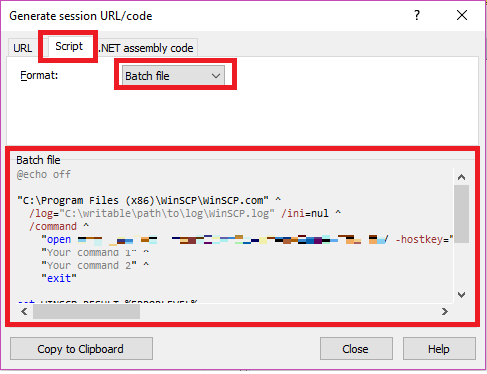
Step 8: Select “Script” tab and select “Batch file” in Format field.
Step 9: Click “Copy to Clipboard” button and paste the code in a notepad.
Step 10: Modify the line “Your command 1” and “Your command 2“. The commands can be get, put or synchronize.
For example, if you want to put/upload a file to the remote directory, then the command goes as below:
Put Syntax:
put <file> [ [ <file2> ... ] <directory>/[ <newname> ] ]
Put command examples:
put file.html
put d:\www\file.html
Get command examples:
get file.html d:\www\If you want to synchronize the folders between the remote and local machine, then you need to use synchronize local/remote/both commands. The below script shows that.
@echo off
"C:\Program Files (x86)\WinSCP\WinSCP.com" ^
/log="E:\Backup\WinSCP.log" /ini=nul ^
/command ^
"open sftp://username:password@domain.com/ -hostkey=""ssh-rsa 2048 leave_the_key"" -rawsettings Cipher=""aes,blowfish,3des,chacha20,WARN,arcfour,des"" KEX=""ecdh,dh-gex-sha1,dh-group14-sha1,dh-group1-sha1,rsa,WARN""" ^
"synchronize local E:\Backup /home/domain/backup" ^
"exit"
set WINSCP_RESULT=%ERRORLEVEL%
if %WINSCP_RESULT% equ 0 (
echo Success
) else (
echo Error
)
exit /b %WINSCP_RESULT
In the above script, I have used synchronize local to sync files between the remote and local machine. It means, the changes in remote directory will be applied to the local directory.
Note: The carrot ( ^ ) is used to split long commands.
Alternatively, you can use
- synchronize remote – the changes from the local directory are applied to the remote directory.
- synchronize both – will modify both the remote and local directories.
Step 11: Save the script as .bat (BATCH) file.
Step 12: Double click on the batch file to test the script. You should see a command window displaying the status of file transfer.
Create task in Windows Task Scheduler
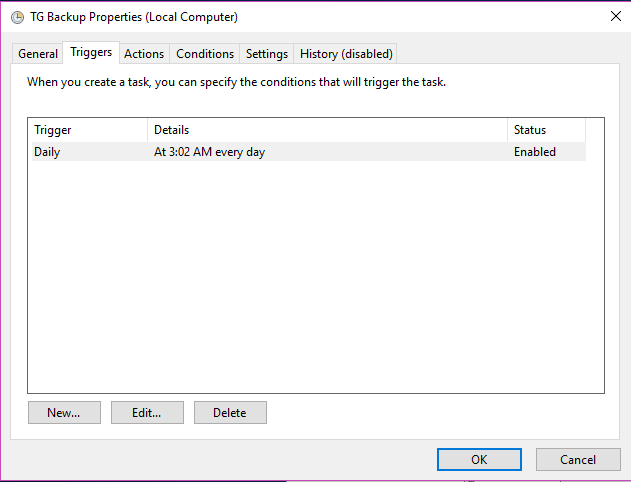
Finally, we’ll schedule the batch script using Windows task scheduler. Probably, you want to schedule a backup at 3 AM everyday or every Monday.
Step 1: Launch Task scheduler program
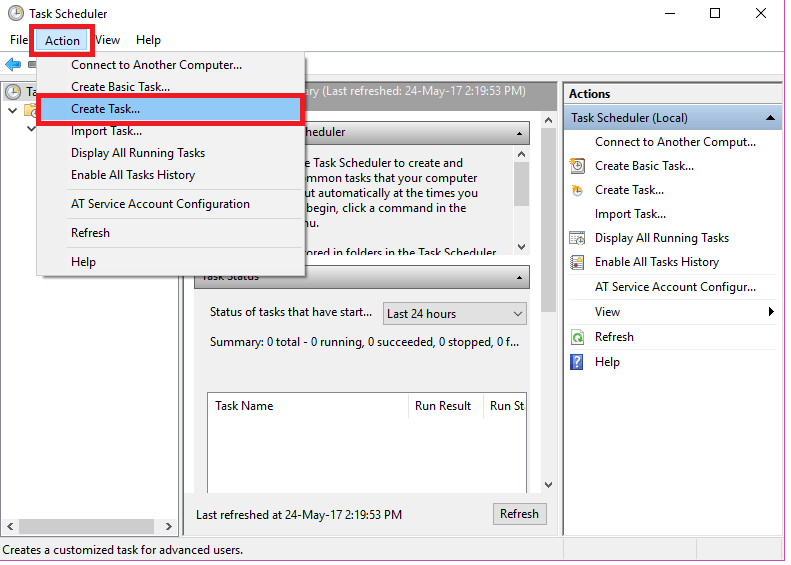
Step 2: From the menu click Action > Create Task
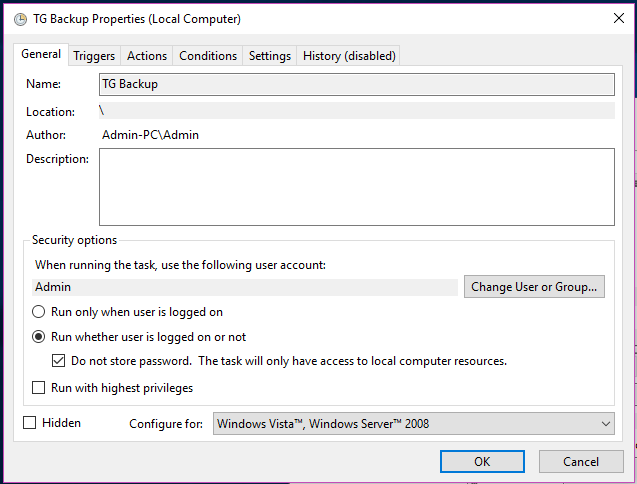
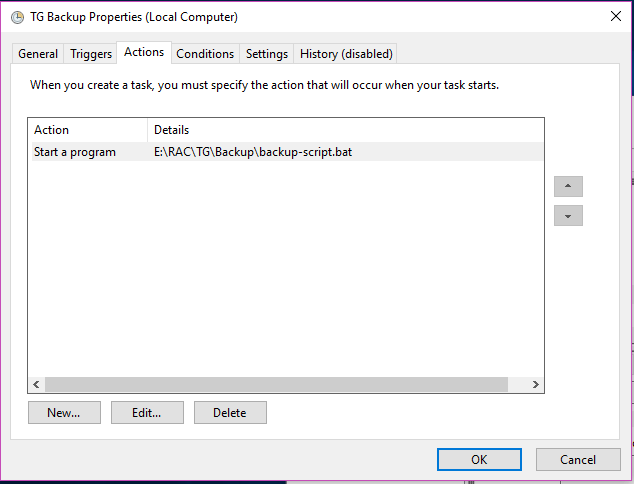
Step 3: Set Name of the task, Triggers, Action and Conditions as shown below:
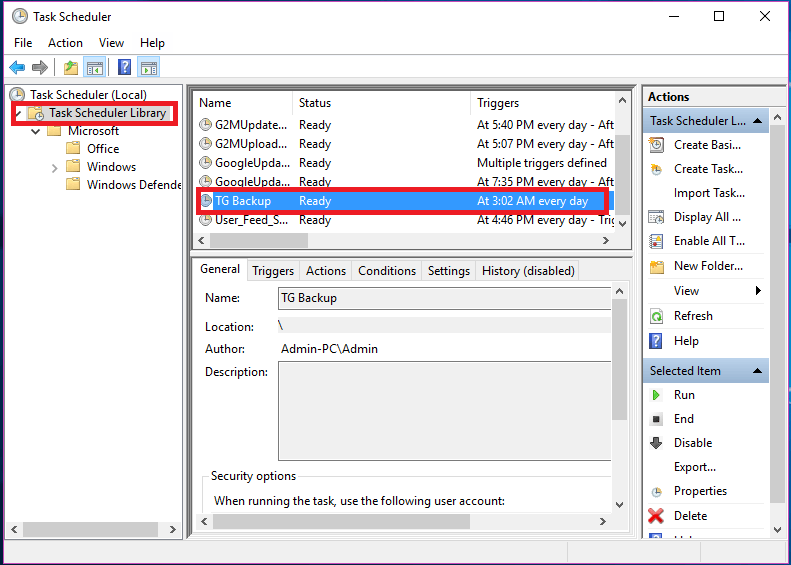
Step 4: Verify if the task has been created properly. To do that, you need to click on “Task Scheduler Library” node from the left side panel and view the list of task on the middle panel.
Step 5: To test the script, just right click on the task and select “Run“.
If you want to take a backup of the task, then right click on the task and select Export.


C:\Users\Administrator\Desktop>script.bat
Searching for host…
Connecting to host…
Authenticating…
Using username “ftpuser”.
Authenticating with pre-entered password.
Authenticated.
Starting the session…
Session started.
Active session: [1] ftpuser@192.168.11.90
Can’t get attributes of file ‘contract.txt’.
No such file or directory.
Error code: 2
Error message from server: No such file
Error
how to put file name to get
how we can transfer automate transfer file from windows to linux ??
Follow the same procedure and in the batch file, instead of synchronize, use the put command shown in Step 10.
very useful, Thank you
Greatly informative.
I got this log
Error occurred during logging. It’s been turned off.
Can’t open log file ‘C:\writable\path\to\log\WinSCP.log’.
System Error. Code: 2.
The system cannot find the file specified
Searching for host…
Connecting to host…
Authenticating…
Using username “cai1”.
Authenticating with pre-entered password.
Authenticated.
Starting the session…
Session started.
Active session: [1] cai1@192.***.*.*
Error
Thanks, really helped out
Very useful
It is very useful