If you ever want to export DNS records of your domain hosted in CloudFlare, then here’s how you can do that.
Steps to Export and Import DNS settings in CloudFlare
Step 1: Login to CloudFlare account
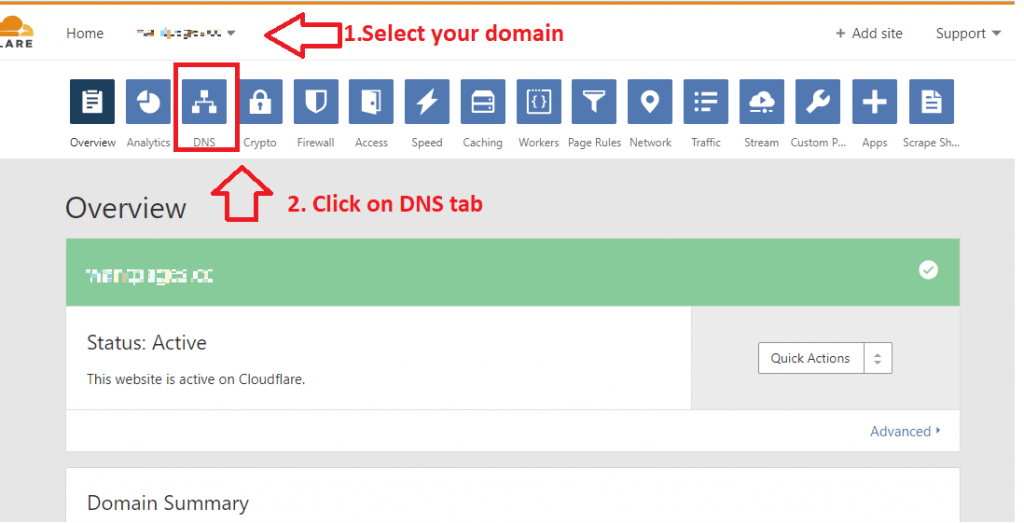
Step 2: Choose the domain by clicking the pull down menu from top left corner.
Step 3: Click on "DNS" tab
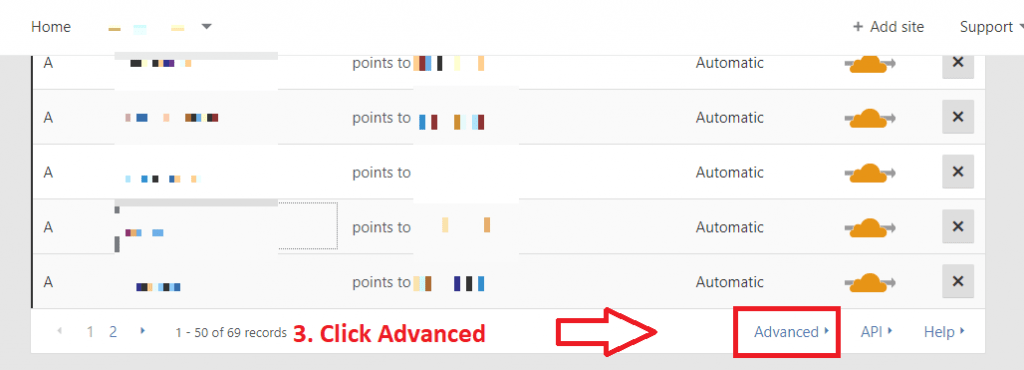
Step 4: You will find all the DNS records listed. Just scroll down to the bottom of the list to find "Advanced" link and click on it.
Step 5: Click on "Export" button to take a backup of all records of that particular domain. The exported file will be in BIND format.
That’s it!
Steps to Import DNS records in CloudFlare
Step 1: Click on DNS tab
Step 2: Scroll down to find the link named "Advanced" and click on it.
Step 3: Click "Upload" button to import all the DNS records into the selected domain.
Note: You might want to edit the exported DNS file before importing. For example, I had to do this process to export all DNS records of a domaina.cc to domainb.cc. Here, i had to edit the exported zone file to replace domaina.cc to domainb.cc and the corresponding IP addresses as well.
Well, if your domain is having only few records, then you may want to create the records manually. But imagine if the domain had few hundred records and recreating all those records would be a hectic process. In such cases, using CloudFlare’s export and import feature would be the ideal way of doing it.


