Recently I was designing a flyer for a client using Adobe Indesign. Initially I was reluctant to do the task using Indesign, because I have never used the tool before. But I thought of giving it a try with Adobe Indesign’s trial version. Soon after installing the tool, I tried creating a new document and from that point I struggled to understand the layout, document units and its various options. I have used Adobe Photoshop, but that experience didn’t help me to understand Indesign. I know, Indesign is an application used to create brochures, flyer, posters, magazines and books. But I had to try out each and every feature after spending some time in googling. Finally, I was able to create the flyer and here’s my experience with the most powerful application out there – Adobe Indesign!
Here are the fifteen things that every beginner should know to get started with Adobe Indesign.
Changing Document units from Pica to Inches
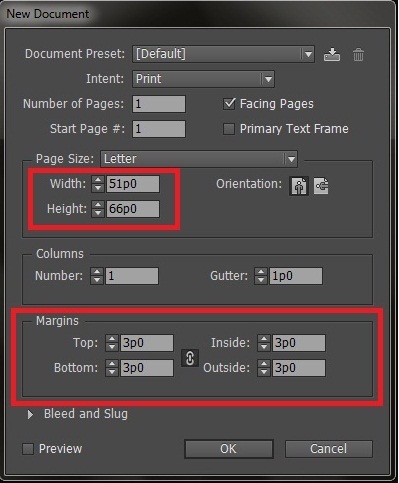
Creating a document in Indesign is simple – click File > New > Document or hit Ctrl+N. Now, you’ll see a dialog box asking you to set the document’s size (width and height). Here’s where my first problem started, the document units were in Pica (p0).
What is Pica?
Pica is also called as Picas. Each Pica will contain 12 points, which is used to represent fixed measurements. Pica is a commonly used measurement unit in Adobe Indesign and other designing tools. So the rulers of the new document that you are creating will have default measurement unit pica. But to be frank, it’s hard for a beginner to understand and set document size in Picas. So let’s see how to convert the unit from Pica to inches.
Option 1: Changing P0 to Inches via Preferences
Before creating a new document, click Edit > Preferences > Units & Increments…In the dialog box, you can change the Ruler units to inches (both horizontal and vertical).
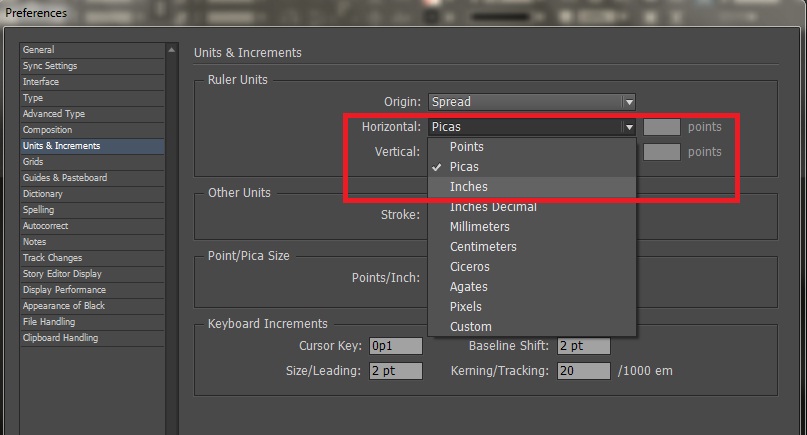
Option 2: Change units temporarily in the Rulers
After creating a new document, you can still change the ruler units from P0 to inches. To do that, just right click on the horizontal ruler and choose inches. Do the same for vertical ruler as well. The current document will instantly set to inches unit.
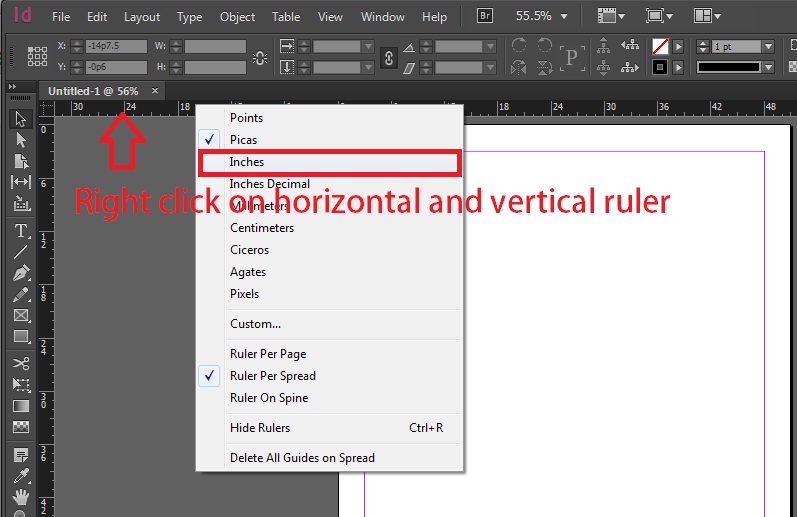
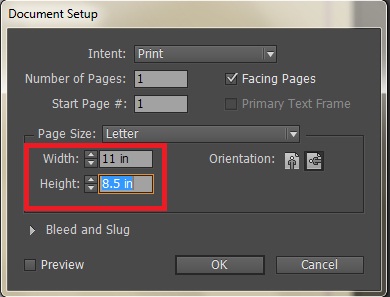
Now that you created the new document without knowing the exact dimension, (after setting the ruler units) you can change/adjust the document size via File > Document Setup.
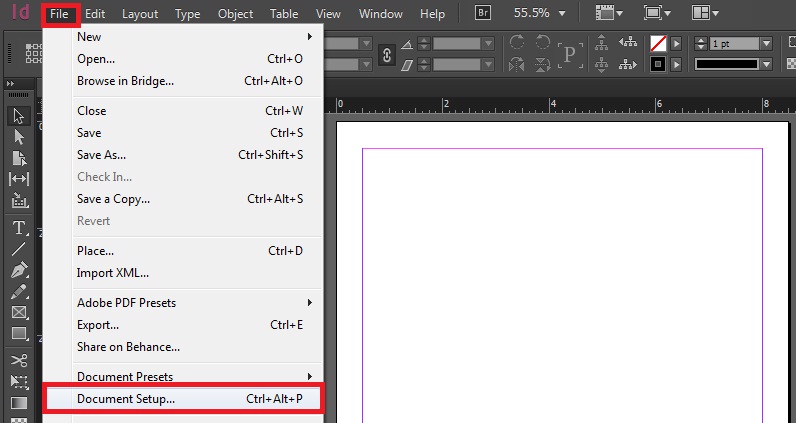
In the “Document Setup” dialog, you can see the width and height units changed to inches. Here you can adjust the width and height of the document.
Understanding Document Options
As I told earlier, creating a new document is simple – click File > New > Document or Ctrl+N. In the new document dialog box, there are few options you should understand.
Intent : For what the document is created for? (A web, Print or for digital publishing)
Number of Pages: Indesign is generally used for creating books, magazines, brochures, flyers etc…It means, you need to create more than one page. This option lets you set the number of pages for the document.
Facing Pages: If you want the left and right pages to face each other, then you need to check this option. For example, if you are designing a book, then you need facing pages.
Orientation : Portrait or Landscape.
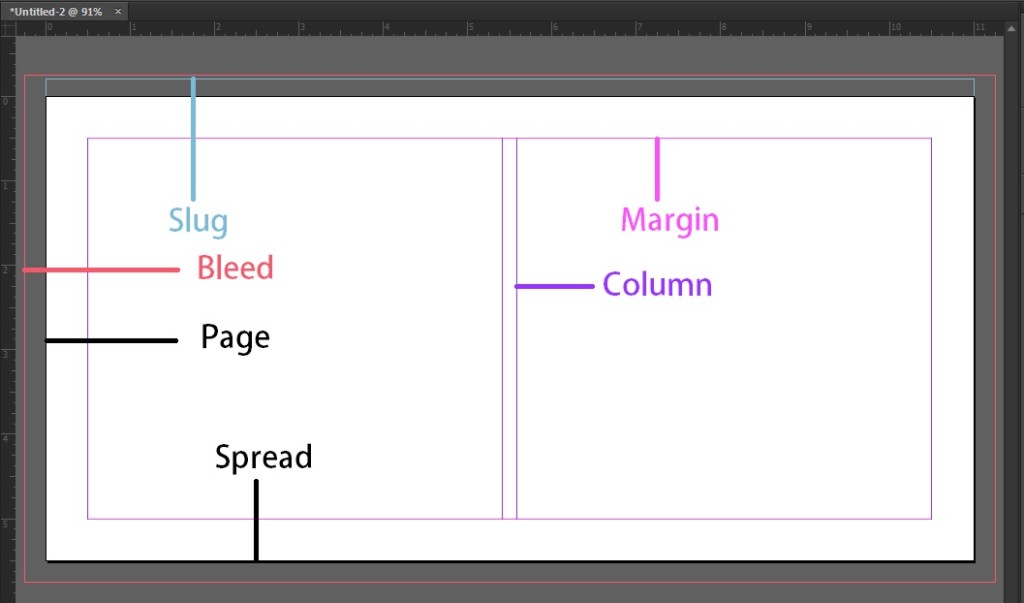
Bleed : If you are designing the document for print, then you might need to set Bleed. For example, Bleed prevents an object placed at the edge of the document from misalignment while printing or trimming. So the ideal way is to add some extra dimension to the document, mostly little beyond the edge.
Slug: Generally holds information about the printing, descriptions and other information. The slug will be discarded when the document is trimmed.
Margin : Set margin for the document.
Note: There are few more options left in the document creation dialog, but as a beginner you might not need to worry about those right now.
Understanding the document layout and guidelines
Each page in the document will have several guidelines. At first, those lines looked confusing, but they are there with some sense.
Document View modes
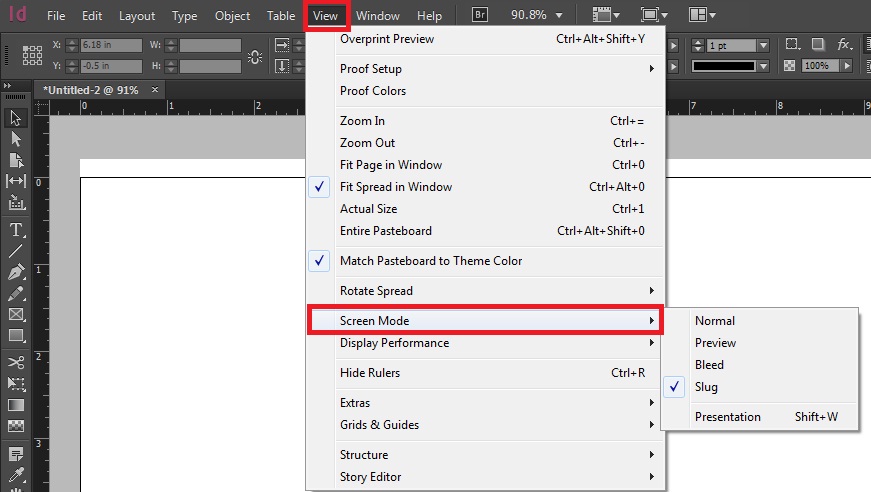
If you still feel that the guidelines in the document are confusing, you can choose to hide those. The document guidelines are visible by default – in Normal screen mode. You may change that via View > Screen Mode.
Adding more pages to the document
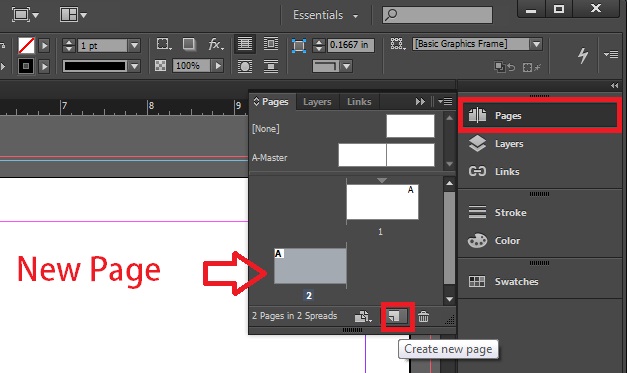
If you want additional pages, then you can quickly add it via “Pages” tab located on the right panel. Alternatively, you can add pages via File > Document Setup.
Navigate between pages in a document
The below image, says it all.
Working with Frames
For creating or placing an object in document, you need to create a frame. Indesign comes with three different frame tools – rectangular, ellipse and polygon.
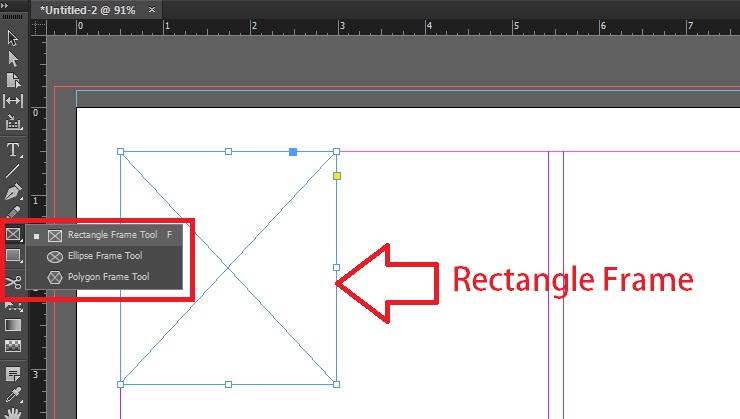
Place an image inside the Frame
If you want to add an image in the document, then you need to create a frame first and then place the image into it. To do that, select the frame into which you like to place an image and click File > Place to import an image.
Alternatively, you can browse and insert an image from Adobe Bridge as well.
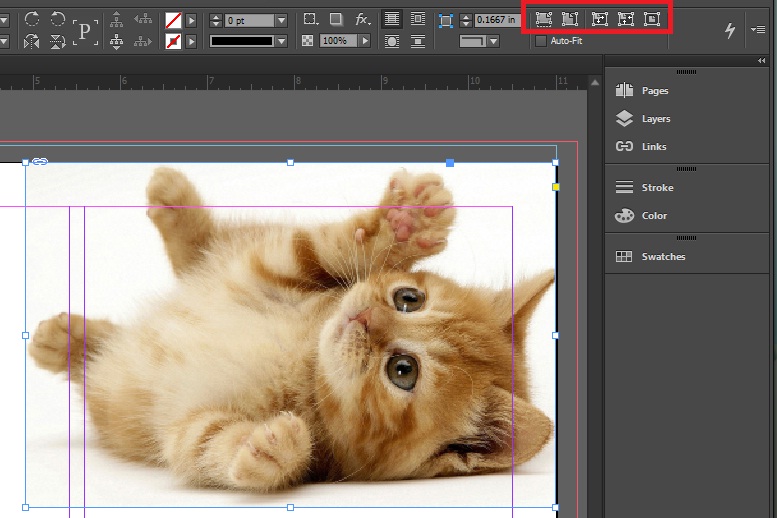
Adjust images inside the frame
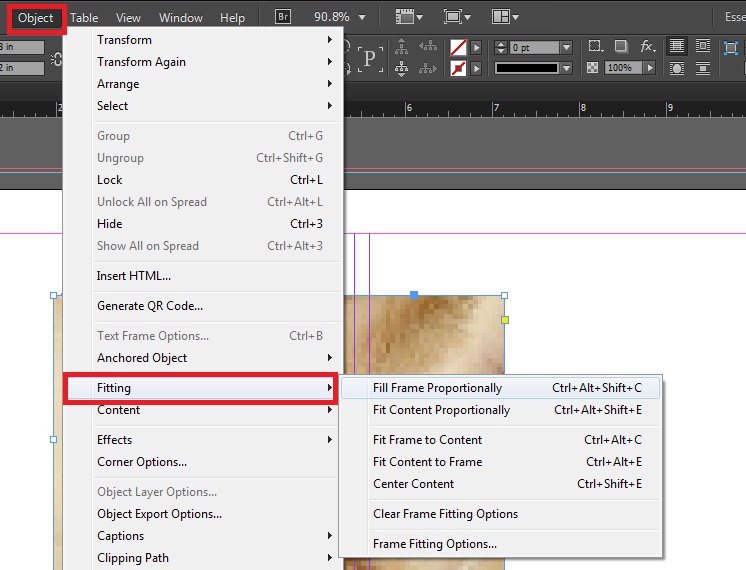
You can fill the image inside the frame proportionally, fit content proportionally, fit content to the frame, fit frame to the content and center align inside the frame.
Alternatively, you can also do the same via Object > Fitting as shown below.
Resize the frame and the image inside it
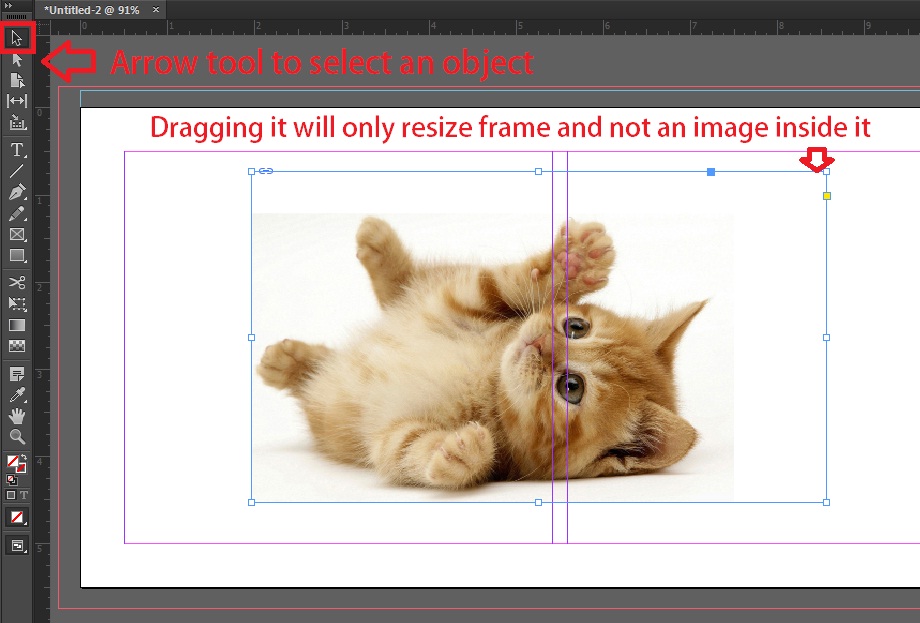
If you want to resize the image, you’ll straight away go and use arrow tool to select the frame and drag it outwards/inwards at the corner isn’t? But that will not resize the image, but only the frame.
Hold shift key (in windows) or cmd key (in Mac) while resizing the frame. This will resize the image inside the frame as well.
Fill background of the document with a color
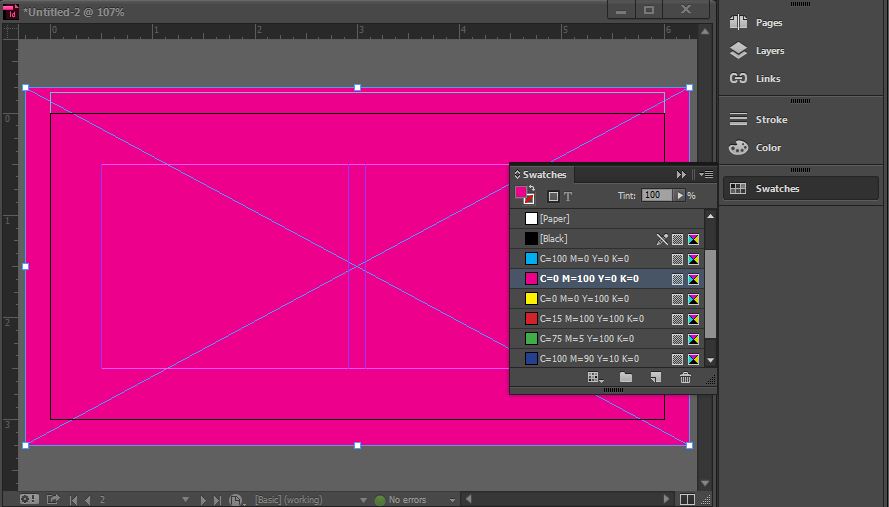
Select the rectangular frame tool and cover the entire document. Once done, click on the Swatches tab from the right panel and select the color you wish to apply.
Create a Custom color
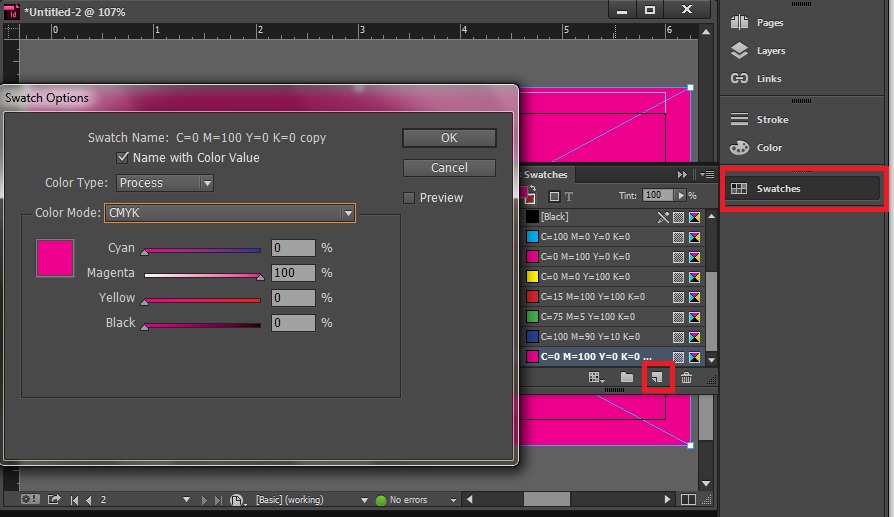
After opening Swatches from the right panel, click on the “New Swatch” icon (second last) located at the bottom of the swatches window. Create a custom color in the New Swatch dialog box.
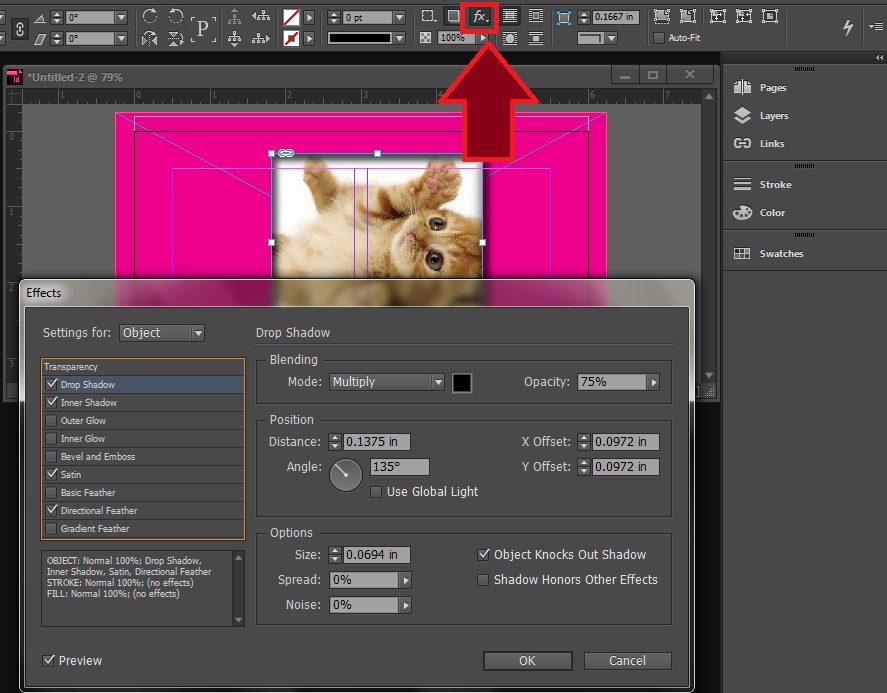
Apply fx effects to objects in the document
Use arrow tool to select the object and then click on “fx” from the toolbar at the top. In the dialog, check the effects you wish to apply.
Convert to different shapes
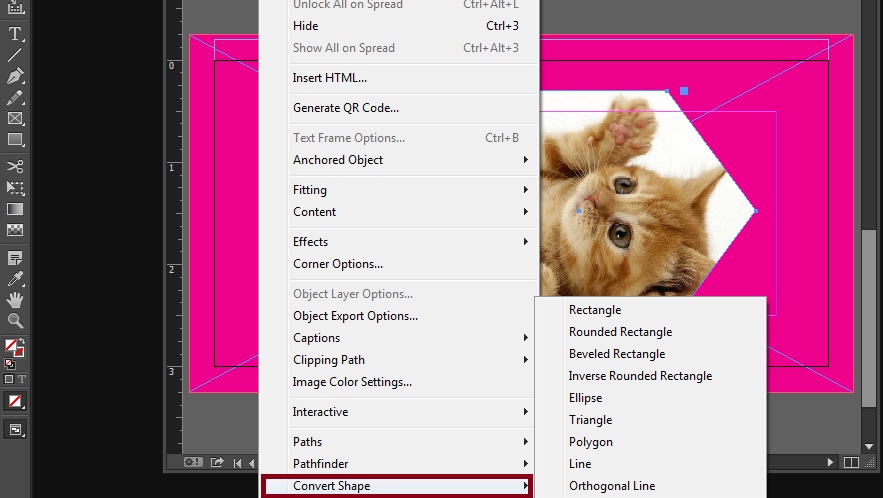
You can quickly convert the graphic frame into any shape – triangle, polygon, rounded rectangle, beveled rectangle, inverse rounded rectangle etc…To do that, use arrow tool to select an object, click Object > Convert Shape.
Create custom shapes
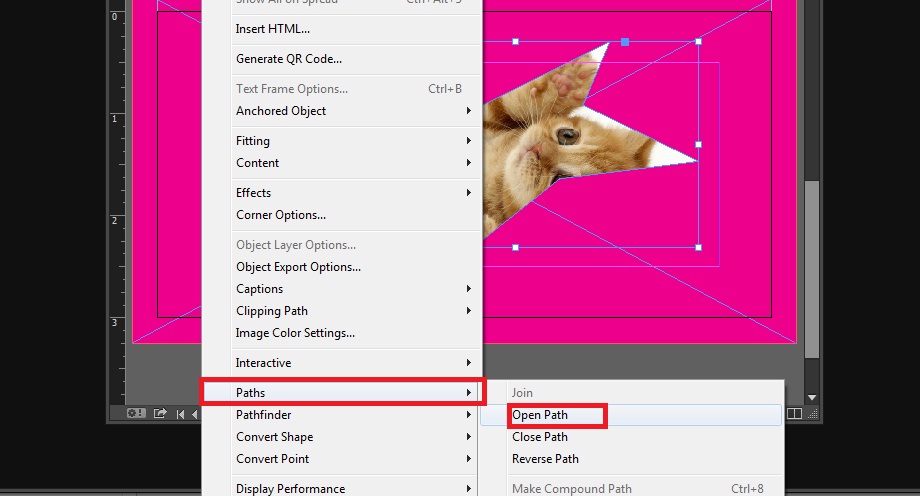
To create a custom shape, select the object, click Object > Paths > Open Path. Once done, you’ll see the cursor changes to Direct Selection Tool. Now, click on the edge of the object and drag it to create a shape.
That’s it!
Note: there are plenty, plenty and plenty of features and wonders that you can do with Indesign, but whatever I have told here are just basic to help you get start with it. Happy Indesigning!
You might also want to learn few more from this video.


