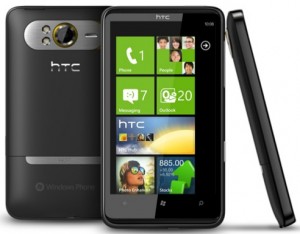
Ok, so you have obtained a new HTC HD7 phone and after using it for a couple of days, you feel a bit bogged down. Chances are that you have noticed a few shortcomings in the features of the phone. Or that you are a geek, who is craving to make your smartphone much smarter by adding features yourself. And yes, you feel let down when you discover that you will have to pay a $99 fee to get your phone unlocked.
You head on to the internet and find that folks worldwide have already got these devices unlocked by installing the custom ROMs. Now this tutorial is exactly targeted for you; to help you out in trying out your first custom ROM installation on your Windows phone device.
Warning !!
First things first, the warnings – Installing Custom ROM is only for advanced users. You might break your phone warranty by installing a custom ROM. You might even end up in bricking your device sometimes. You must understand that neither the developers of these ROMs nor the writers of the article or forum topics endorse the installations.
If you still feel you are a braveheart and can act responsibly, then head on for the next steps in the tutorial.
Credits
Much of the stuff in this tutorial is borrowed from the XDA developers forum. Credits go to the individual contributors and the chefs of custom ROMs in the XDA forum. Say a big thanks to them!
Now, lets get into action..
Step 1. Download “Task 00” and “Task 29”
a) You now have to download two programs called the ‘task 00’ and ‘task 29’. You can download them from here and extract the contents from the archive.
b) Make sure that the Zune software is installed on your desktop. Also Active Sync (for Windows XP) and Windows Mobile Device Center (for Windows Vista & Windows 7) have to be installed on the desktop. This will install the necessary USB drivers required to communicate between the desktop and your mobile device.
Step 2. Downgrade the SPL
If you have updated your Windows phone, chances are that you are updated with the latest Mango release from Microsoft, which installs a Bootloader with higher version number.
To check your current Bootloader version, goto the ‘Settings’ menu in your Windows phone. Choose ‘About’ and click the “more” button. This displays the current Bootloader version.
If the current Bootloader on your phone is 3.xx or lower, then you can skip the rest of this step and jump to the Step 3. If your bootloader is of version 4.xx, please continue as explained below in the Step 2.1
Step 2.1 Install the NoDo radio to downgrade the bootloader version
You have to download a different radio for installation now. Installing this will downgrade the bootloader version on your phone.
a) Download a NoDo or Pre-NoDo Radio which is specific to your device, based on the description given here (XDA forums link). Extract the contents.
b) Now Turn off your device. Hold down the volume button and press the power button to start the device. This will boot the device in the bootloader.
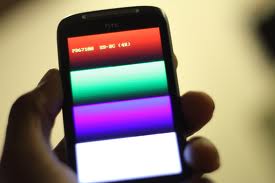
c) The device now should show a multi coloured layered screen, with “Serial” written at the bottom most layer (usually coloured in White).
d) Connect the device to the desktop. The text “Serial” will immediately change to “USB”.
e) On your desktop, from the folder containing the extracted contents of the downloaded radio, find a folder called “stock”. Under this folder, a file called “SPL_Signed.nbh” will be present. Copy this file to the folder containing the executable of “Task 00” that you had downloaded in Step 1.
f) Start the “Task 00” executable and proceed with the wizard. This will flash the radio and the SPL onto the device.
g) After the successful installation, reboot the device and check the bootloader version, as described in Step 2. It should now show a bootloader version of 3.xx or lower.
Step 3. Install the RSPL
a) Now Turn off your device. Hold down the volume button and press the power button to start the device. This will boot the device in the bootloader.
b) The device now should show a multi coloured layered screen, with “Serial” written at the bottom most layer (usually coloured in White).
c) Download the XSPL archive to your desktop from here (XDA forums link) and extract the contents of the archive. Run the RSPLxxxx_LAUNCH.exe on your desktop. After going through the information displayed by the tool, press the Next button.
d) Connect the device to the desktop. The text “Serial” on the multi colored screen will immediately change to “USB”.
e) Now press the “Next” button on the tool running in the desktop. It will try to detect the device connected. If the SPL is 5.xx or 4.xx, then do not continue. Please downgrade it using the steps described in Step2. If the SPL is 3.xx or lower, then choose the closest OSPL matching to your bootloader version number that was shown after the downgrade – as in Step 2.1 – (g)
f) Press the Next button, to begin the installation of the RSPL. The tool now installs the RSPL and if successful, will reboot the device. You can now close the tool on the desktop.
g) The device, after reboot, should show the multicoloured bootloader screen, with the text as “RSPL x.y.z and CotullaRSPL.
Step 3. Download the custom ROM
a) You should now download the custom ROM for installing on your device. Go through the features supported by them on their individual threads in the forum and choose a suitable ROM of your choice. Some of the popular ROMs are listed below :
DeepShining ROM – from here
NextGen+ ROM – from here
b) After downloading the ROM, extract the contents of the archive. It should contain .nbh file. Copy this file to the folder containing the “Task 29” executable (Refer to Step 1 ).
c) Start the “Task 29” and complete the wizard to flash the ROM. The tool will display a progress bar during the flashing process. A progress bar will be displayed on your device as well. If the flashing succeeds the device will reboot with the new ROM.
Voila, your device is now running with a custom ROM. Congratulations!


thanks man! this is very helpful! 100% working