Well, there are plenty of reasons why you should run latest version of Linux Kernel. For instance, the current kernel might have bugs that can be exploited by the hackers or you want to try out some device driver that requires latest version of Kernel or you just want to keep your system up-to-date. Whatever might be the reason, upgrading your system to the latest Kernel should hold the high priority in your system maintenance check list.
I’ll show you how to upgrade Linux Kernel on CentOS machine. For the demonstration, I’m going to upgrade kernel from 2.6.32-358 to 3.12.
Let me show you the current kernel version I have.
$uname -r
2.6.32-358.el6.x86_64
Get ready with these prerequisites. Install these as ‘root’ user.
$ yum groupinstall "Development Tools"
$ yum install ncurses-devel
You should also update other packages before upgrading the kernel.
$ yum update
Download Kernel 3.12
Lets download the latest kernel from kernel.org. At the time of writing this article, the latest Kernel version was 3.12.
$wget https://www.kernel.org/pub/linux/kernel/v3.x/linux-3.12.tar.xz
Unpack the downloaded Kernel to ‘/usr/src/’
$tar xvfvJ linux-3.12.tar.xz -C /usr/src
Lets get into the unpacked folder.
$ cd /usr/src/linux-3.12
Note: If you didn’t know how to extract .xz files, then read this tutorial.
Generate the Kernel configuration
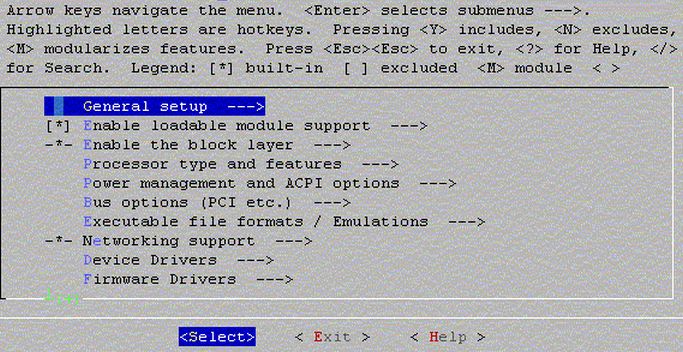
To generate the Kernel configuration using graphical interface, execute the below command.
$ make menuconfig
You should see an interface as shown below.

Don’t want to create new configuration? Make use of the existing kernel configuration.
$ sudo make oldconfig
But you will still have to answer the questions asked. If you are not sure about the question, just hit enter to input the default answer.
Configure Kernel
$make
The above command would take around 40-50 minutes depending upon your system speed.
Install Kernel
$ make modules_install install
The above command would take around 20-30 minutes depending upon your system speed.
Configure grub to load the latest Kernel
$vi /etc/grub.conf
However, the path of grub configuration might vary on your system. If not /etc/grub.conf, it might be in /etc/grub/grub.conf.
Once the grub.conf is opened, set the ‘default’ variable to the position of your new kernel. For instance, in my case, the latest kernel was in zeroth position.
default=0
You can verify the new kernel installation at the following locations.
$cd /boot
$ls -lrt vmlinuz-3.12
$vi /boot/grub/menu.lst
Now you are good to reboot the system.
Problems? I’m not able to remote login to my system after the kernel update.
Connect terminal to the machine and check for the device files using the below command,
ls –lrt /dev/ptmx
ls –lrt /dev/pts/
ls –lrt /dev/random
ls –lrt /dev/urandam
ls –lrt /dev/null
Don’t find any devices? Jump to Create /dev files heading below. If you are able to find /dev/pts, open the below file.
$vi /etc/fstab
Do you able to find an entry for /dev/pts? If not, add the one as shown below,
none /dev/pts devpts gid=5,mode=620 0 0
Run,
$mount -a
Makedev tty & pty
Run the below commands:
/sbin/MAKEDEV tty
/sbin/MAKEDEV pty
Create /dev files
If you didn’t find device files, create it with the help of below commands:
mknod /dev/random c 1 9
mknod /dev/urandom c 1 9
mknod /dev/ptmx c 5 2
mknod /dev/null c 1 3
chmod +666 /dev/null
Now we have made the way for remote connection temporarily. To do it permanently,
$vi /etc/rc.d/rc.sysinit
Look for start_udev, in the next line add the below items,
mknod /dev/random c 1 9
mknod /dev/ptmx c 5 2
Disclaimer: The above steps worked for me and I'm sharing those with you all. It might be slightly different on your environment. So take necessary care while upgrading. Techglimpse.com or the author doesn't holdany reponsibilities for the damage that cause to your operating system.


ERROR: modinfo: could not find module xen_netfront
ERROR: modinfo: could not find module xen_blkfront