
All windows users who connect to their Linux servers need not have an introduction about this great tool called PuTTY. But for those who are new, here is what PuTTY is : It is a SSH and telnet client, developed originally by Simon Tatham for the Windows platform. Click here to know more about putty. Here we shall see those 10 tips & tricks you were never known about PuTTY.
1. How to Enable Logging in PuTTY ?
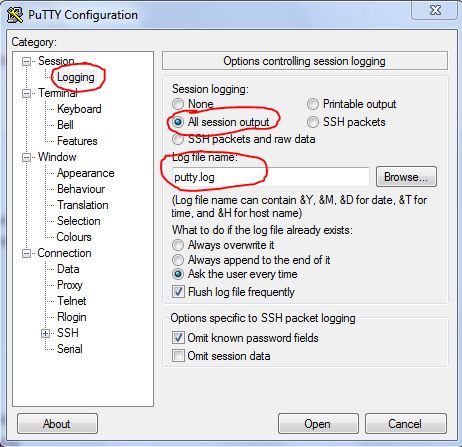
Open PuTTY by double clicking on the PuTTY.exe. Select Logging from the left menu. On the right side under Session logging : select All session output radio button. Under the Log file name : select the file to which the logs should be saved. Rest leave as default. Checkout the below image with Highlighted :
2. How to change default background and foreground colors in PuTTY ?
1) Open Putty
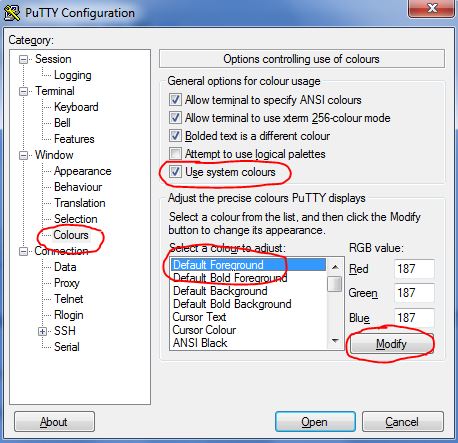
2) Select Colours from the navigation tree on the left hand side.
Method 1 :
3) Select Use system Colours on the Right hand side.
Method 2 :
3) Select Default Foreground
3) Click Modify on the right side.
5) Click the color palate to select a new color and click OK
6) Use the above technique to change Default Background too.
3. How to change Default Font-size in PuTTY ?
1. Open PuTTY.
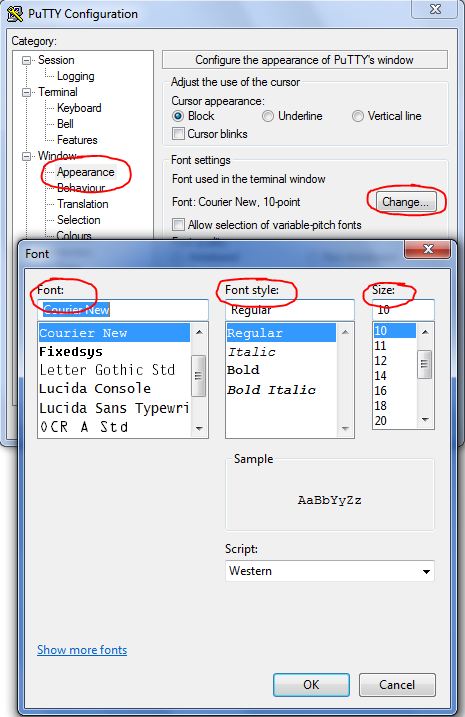
2. Select Appearance from the navigation tree on the left hand side.
3. Click the Change button on the right hand side.
4. Now you can select your favorite Font, Font-Style and the Font-Size.
4. How to restrict PuTTY window re-size ?
Sometimes, we may have to restrict the window resize option. To do, follow the below procedure.
1. Open PuTTY.
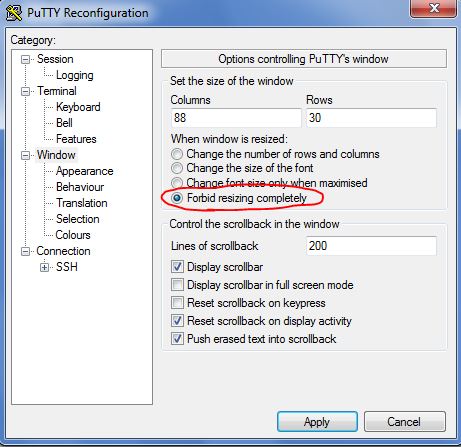
2. Select Window from the navigation tree on the left hand side.
3. Select Forbid resizing completely radio button.
4. Once you login, now you will not be able to resize the window. To re-enable just select option other than the Forbid resizing completely.
Few other option to consider on PuTTY window re-size are :
> Change the no. of rows and columns.
>Change the size of the font.
> Change the font size only when maximized.
5. Change the PuTTY session window title ?
By default, PuTTY displays “username@hostname:~” in the PuTTY window title after you login. You can change this by following below procedure :
1. Open PuTTY and select any saved session.
2. Select Behaviour from the navigation tree on the left hand side.
3. Modify the window title to add your custom Window Title on the right hand side text-box.
4. Make sure to save the session, after this change.
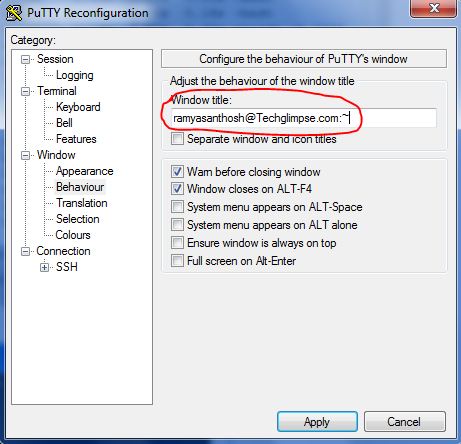
Load this saved PuTTY SSH session and login to the server. Now you can see your custom Window Title as shown below :

6. PuTTY Event Log
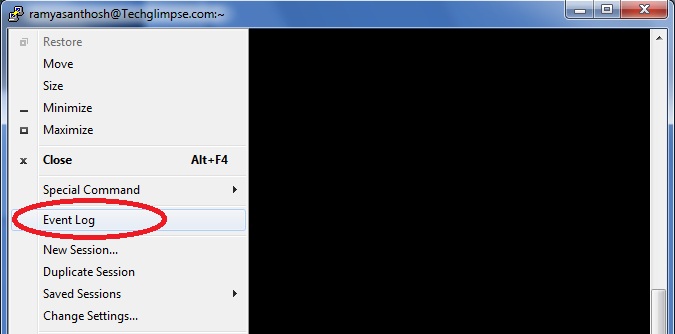
When you are trying login to a remote server, you might get few issues like, you would be denied login, you would not have proper ssh-keys etc., By enabling Event log in PuTTY, it is easier to come to a conclusion for what has been causing the issue. To see the event log, right click on the PuTTY Window title and select “Event Log” menu-item as shown in the below fig.
7. How to enable Rich Text Editor Format for copying in PuTTY
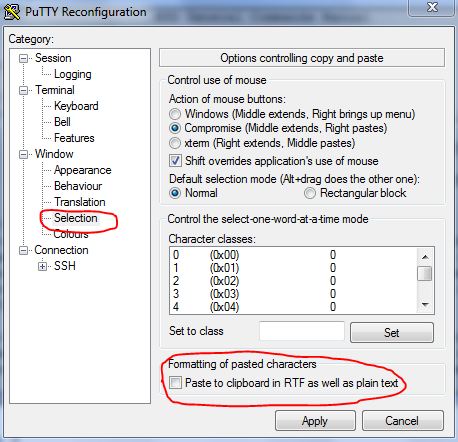
By default when you copy/paste from PuTTY window to a word document, it will paste only in plain text. To copy text from PuTTY window in Rich Text Editor format, follow the below procedure :
1. Open PuTTY.
2. Select Selection from the navigation tree on the left hand side.
3. Select check box “Paste to clipboard in RTF as well as plain text” as shown in the image below.
8. Change the default system alert sound in PuTTY
During a remote server access using PuTTY, the system alerts the user of an error or warning through default bell sound. If you would like to hear, just login to any of the remote server and press CTRL+G (ASCII code 7) and you hear a bell sound. Instead you can play your own custom sounds by following the below procedure :
1. Open PuTTY.
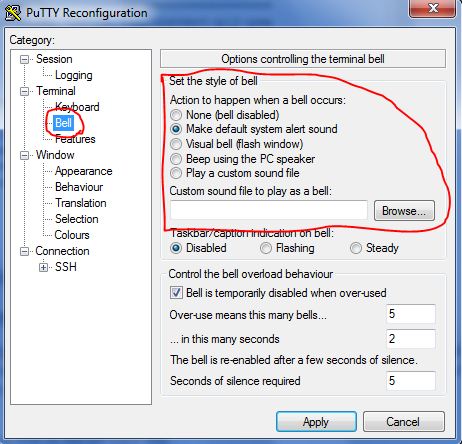
2. Select Bell from the navigation tree on the left hand side.
3. Select one of the following on the right hand side.
- Selecting ‘None’ disables the bell completely.
- This is the default alert sound ‘Make default system alert sound’.
- ‘Visual bell’ is a silent alternative to a beeping computer.
- ‘Beep using the PC speaker’ is self-explanatory.
- ‘Play a custom sound file’ allows you to specify a particular sound file to be used by PuTTY. If you select this option, you will also need to enter the name of your sound file in the edit control ‘Custom sound file to play as a bell’.
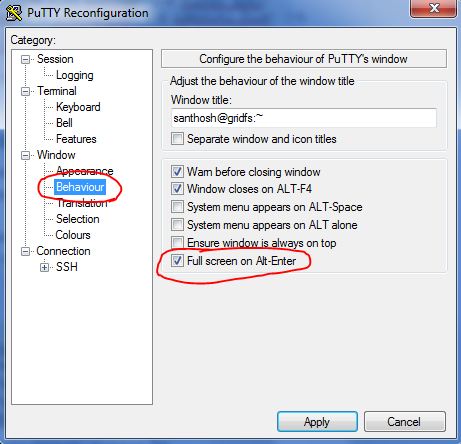
9. How to make PuTTY in Full screen mode ?
Sometime during demo to the audience, having a smaller PuTTY window would make less visible and other windows to distract the audience. In order to eliminate these anomalies, you can put PuTTY window into full screen mode.
Method 1 :
1. Open PuTTY.
2. Select Behaviour from the navigation tree on the left hand side.
3. Select the check box “Full screen on Alt-Enter”.
After you login to the remote server, on pressing Alt+Enter would make the PuTTY window go full screen.
Method 2 :
On an already running PuTTY session, right click on the PuTTY window title and select “Full Screen” from the menu list.
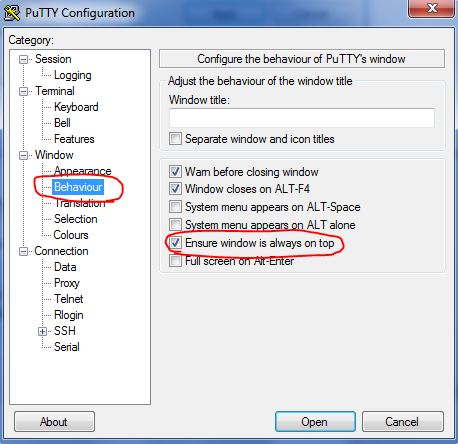
10. How to make PuTTY always on Top ?
During system monitoring, you may need PuTTY window to stay on top of all the windows.
1. Open PuTTY.
2. Select Behaviour from the navigation tree on the left hand side.
3. Select the check box “Ensure window is always on top”.
11. How to Delete Outdated RSA Keys from PuTTY in Windows?
Learn to delete outdated RSA keys from PuTTY here.
