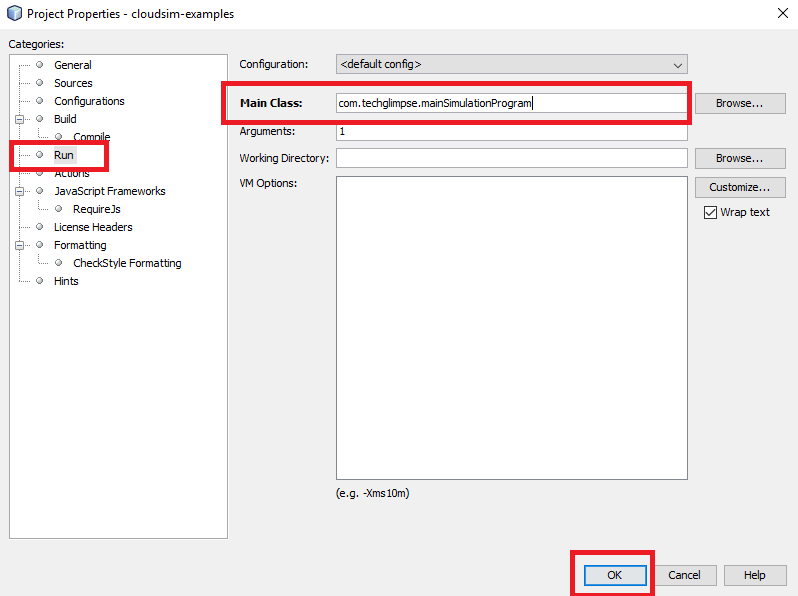
It was my first Java project after several years of working with Linux and PHP. Fortunately, Maven with NetBeans saved my day. But what I felt was lacking with NetBeans is the ability to create Maven JAR file – yes, I couldn’t find an option to generate a Maven JAR using the IDE. Generally, you can simply right-click on Project and select Properties > Run and set main class to make an entry in MANIFEST.MF of the generated jar. But this will only create simple JAR and not Maven jar. It seems like creating Maven JAR is not a straightforward option in NetBeans – where you have to manually edit the configuration called pom.xml. POM stands for Project Object Model, which is an XML file containing information about the project and configuration details for Maven to build the project.
Creating JAR file in NetBeans
How to generate Maven jar file in NetBeans?
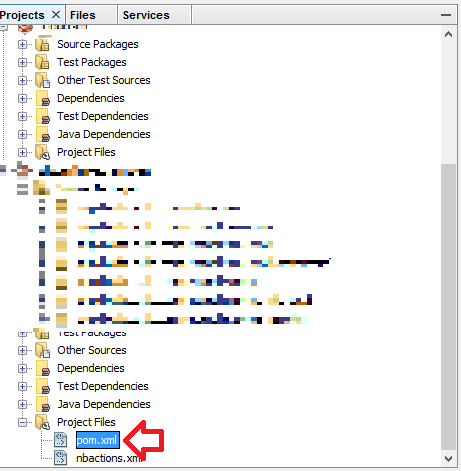
1. In the Project window, double click pom.xml under Project > Project Files
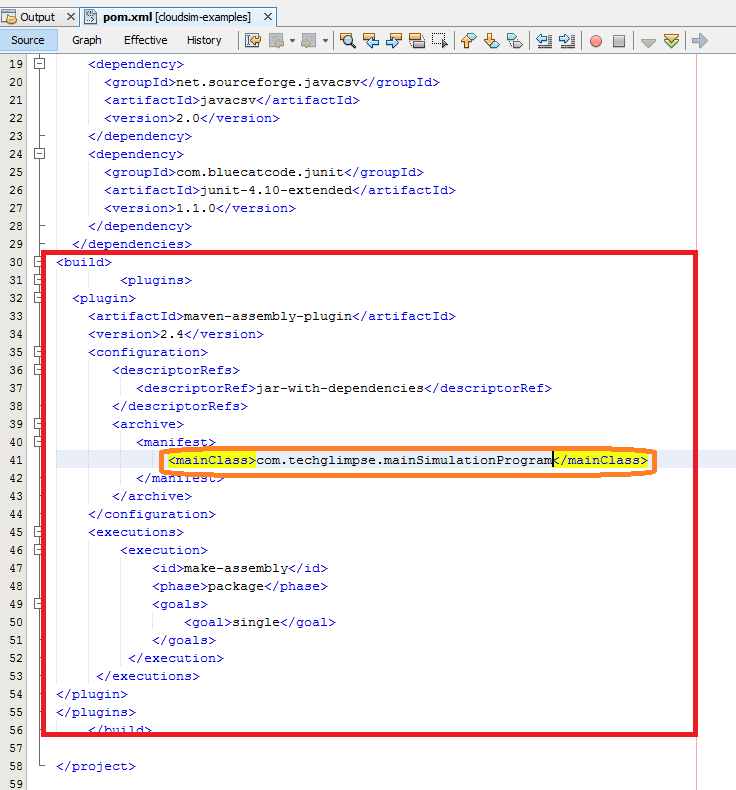
2. In pom.xml file, copy and paste the below code (just before the closing project tag)
<build>
<plugins>
<plugin>
<artifactId>maven-assembly-plugin</artifactId>
<version>2.4</version>
<configuration>
<descriptorRefs>
<descriptorRef>jar-with-dependencies</descriptorRef>
</descriptorRefs>
<archive>
<manifest>
<mainClass>com.techglimpse.mainSimulationProgram</mainClass>
</manifest>
</archive>
</configuration>
<executions>
<execution>
<id>make-assembly</id>
<phase>package</phase>
<goals>
<goal>single</goal>
</goals>
</execution>
</executions>
</plugin>
</plugins>
</build>
3. Lookout for the tag <mainClass> and replace it with the main class of your project.
4. Save pom.xml
5. Now Build project and lookout for the jar files under target directory in PROJECT_HOME. (PROJECT_HOME is the directory where the project files are stored)
Once done, you should be able to run using the below command.
$ java -jar <generated_maven_jar>.jar
That’s it. Hope it helps someone out there.


Thanks, a lot. You are amazing.
thank you for post. you saved me a lot of time
i did all steps perfectly and it shows this error:
Error: A JNI error has occured, please check your installation and try again.
Truly the most useful description of jar file creation – very explicit and solves the confusing problem of POM file edit!