
Divi is one of the popular page builder for WordPress. It allows you to build anything instantly by inserting content elements such as text, image, gallery, contact forms etc…I have been using Divi for quite sometime and I was never put in a situation to create circular/round images. But off late, one of my client wants me to change all service boxes to circular images. I mean, the request was to change the rectangular boxes that contained an image & description into a circular/round image. So how do you do that?
At first, I thought Divi might have a module to insert circular images. Unfortunately, it wasn’t having one. So what if I adjust the rounded corners? Sadly, even that will not give a circular image. So what’s the alternative? Well this tutorial will explain how to add circular images in Divi for WordPress.
Generally, the circular images need an equal height and width. Say, 100×100 or 300×300 pixels whatever, but the image should be a perfect square. So the first step was to crop the image to a perfect square.
How to add circular images in Divi for WordPress
Step 1: Crop the image to have equal height and width.
Step 2: Click on "Insert module(s)" and add an "Image" module.
Step 3: Browse and upload the cropped image.
Step 4: Click on "Advanced" tab in the "Image Module Settings"
Step 5: Add "circular" in CSS Class text field.
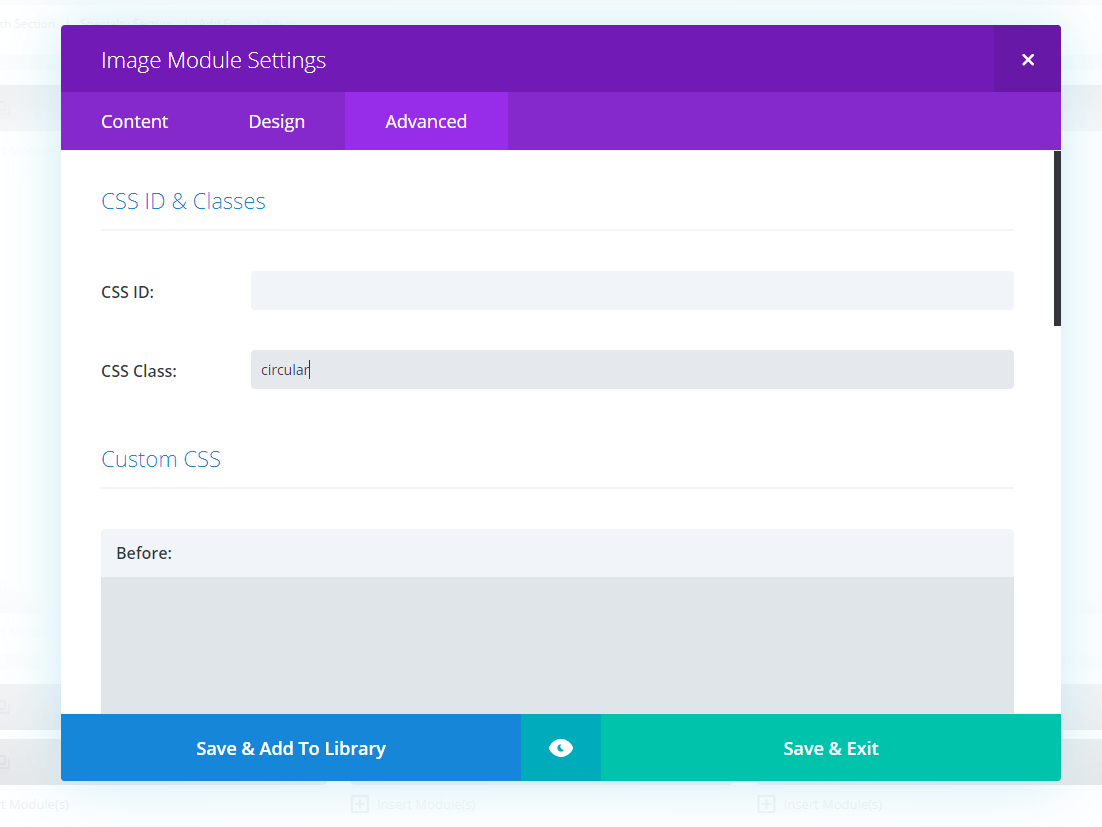
Step 6: Click on "Save & Exit" button at the bottom
Step 7: Copy and add the below CSS code to your style.css or Appearance > Customize > Custom CSS.
/* Circular images */
.circular img {
 border-radius: 50%;
}
That’s it!. You should now see a circular image as shown below:


Great tut!
CSS produces an error
good article. Thanks