I was assigned a task to create Windows image for OpenStack unlike most Linux distros, it is not possible to download generic qcow2 images, we can’t find any for Windows images on the internet. This guide shall provide in detailed explanation for creating a Windows qcow2 image to be used on the OpenStack cloud. This article can be used to boot any of the Windows OS’s.
Pre-requisites
Before we get started, the following are needed:
- Microsoft Windows Installation ISO (Evaluation Versions)
- Red Hat’s Virtio drivers for Windows
- CentOS Linux with KVM installed
- Min 15GB Disk Space available
- Min 2GB RAM available
Create Windows image for OpenStack
Configure VM for Windows using virt-manager GUI
Login to your CentOS Linux machine that has KVM installed using MobaXterm and execute virt-managerGUI command.
# virt-manager
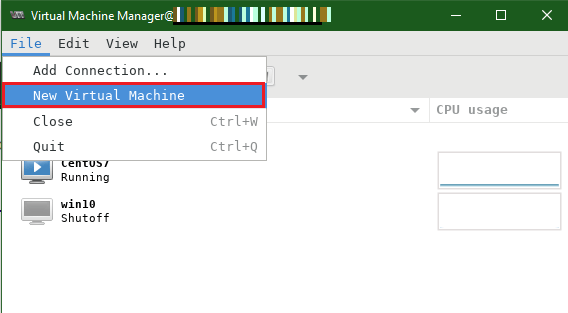
From the Virt-Manager windows, navigate to File -> New Virtual Machine
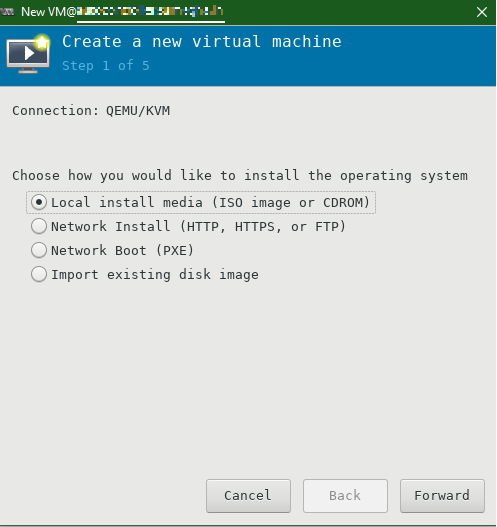
Choose your Installation media
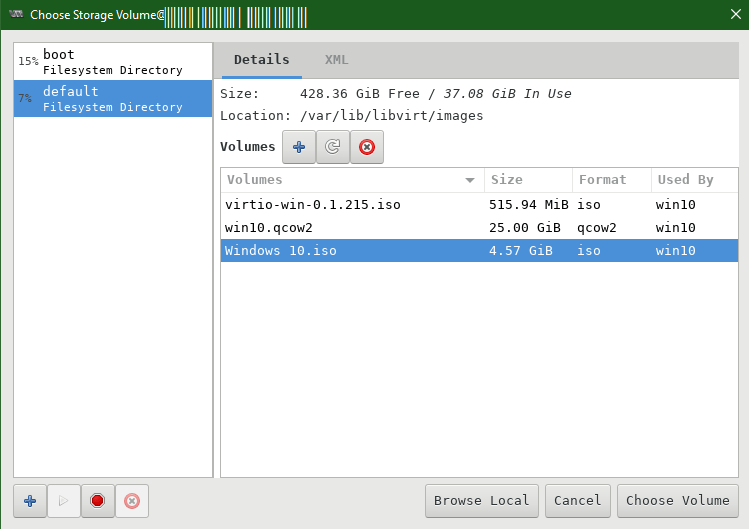
Specify the PATH of the Windows ISO file and click Choose Volume button.
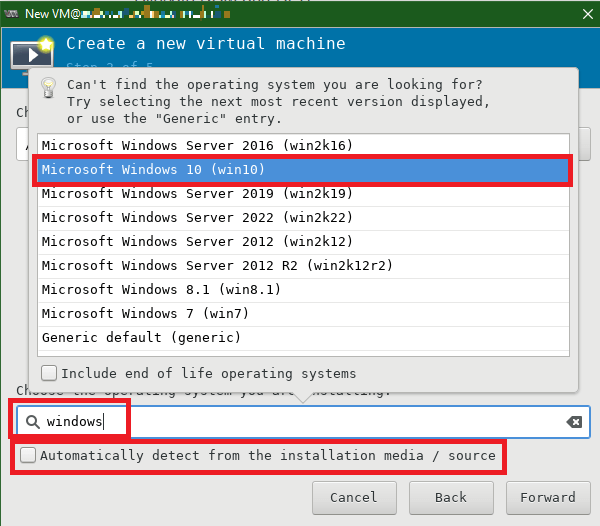
Choose the operating system you are installing. Uncheck the radio button so as not to automatically detect the OS. Type your OS name and select the appropriate OS. For this article’s purpose, I’m installing Windows 10.
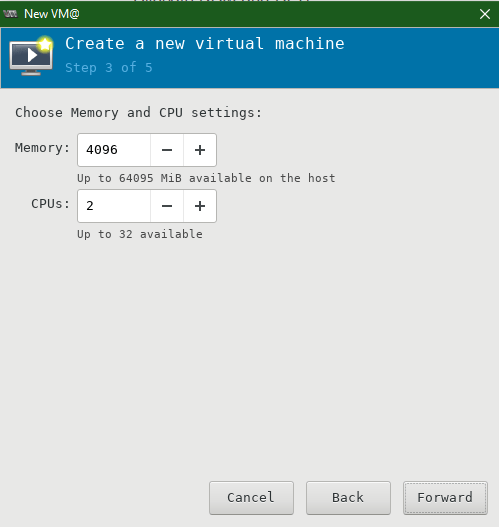
Allocate RAM and CPU
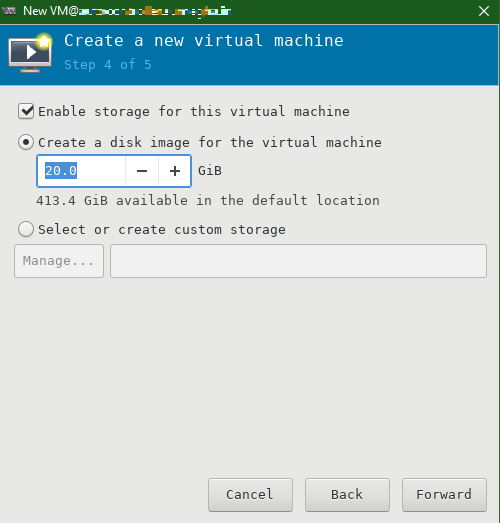
Specify the size of the Virtual Hard Disk
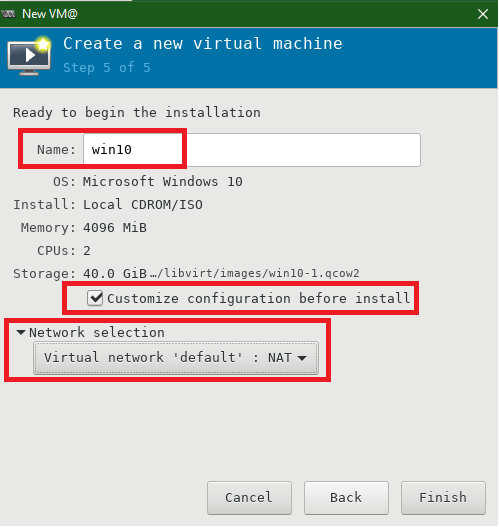
Choose a name for the VM, select the network type as Virtual Network: NAT, and select the radio button Customize Configuration before install.
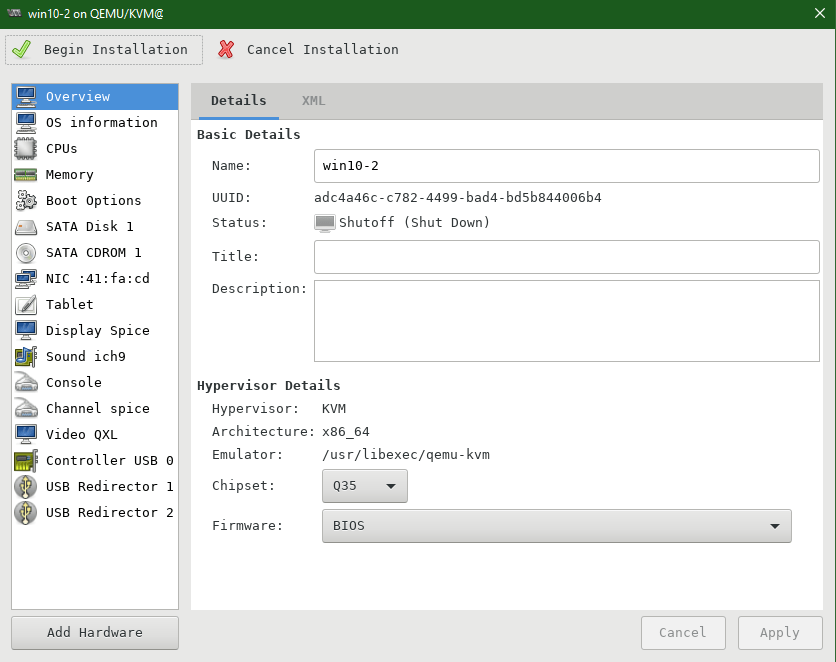
Upon finish, QEMU/KVM configuration window opens
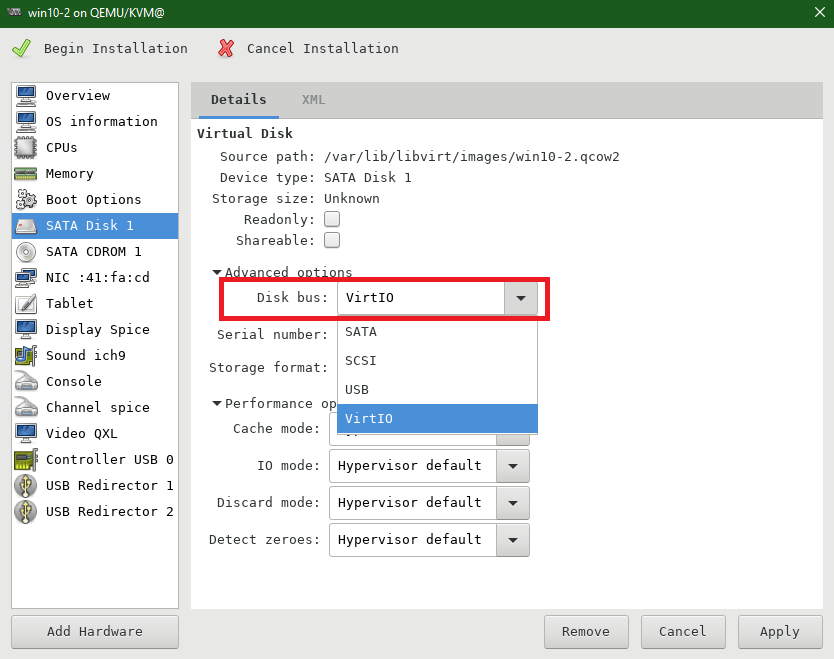
Navigate to SATA Disk 1 and choose VirtIO as Disk bus
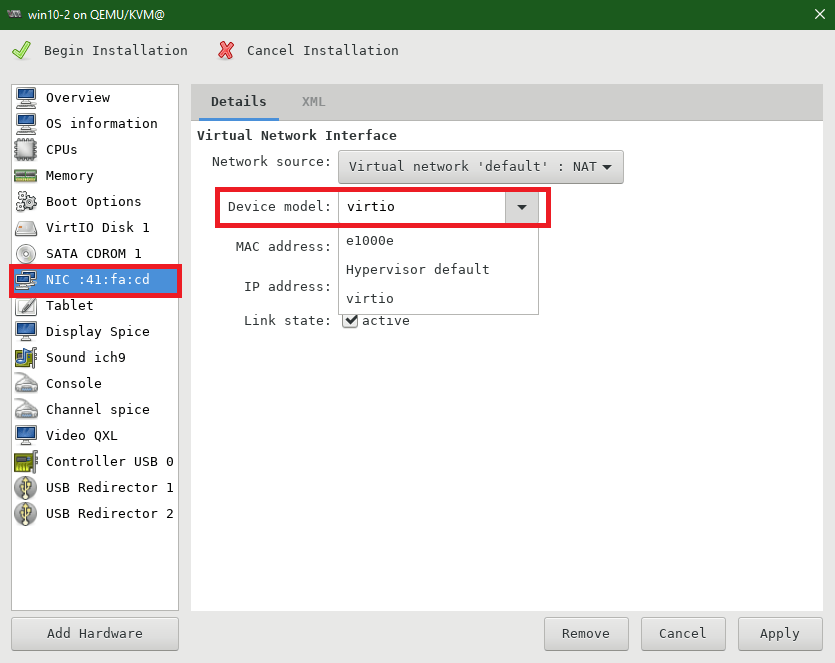
Navigate to NIC (Virtual Network Interface) and choose VirtIo for Device model
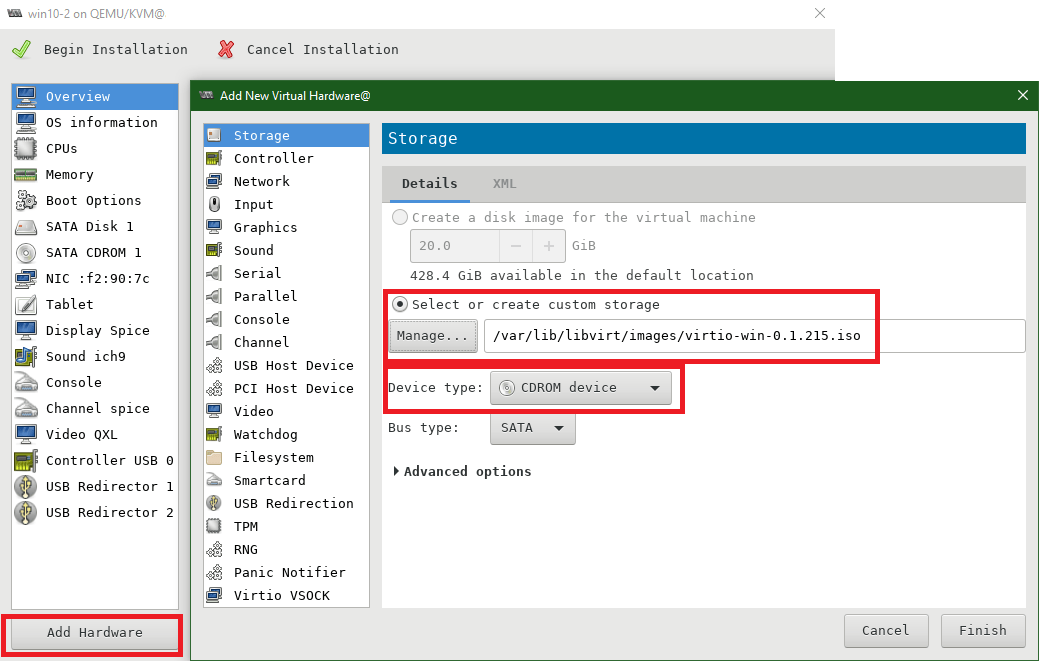
Click on Add Hardware. Under Storage, choose the device type as CDROM device and click manage and select Virtio iso file and click Finish button.
Windows Installation on KVM
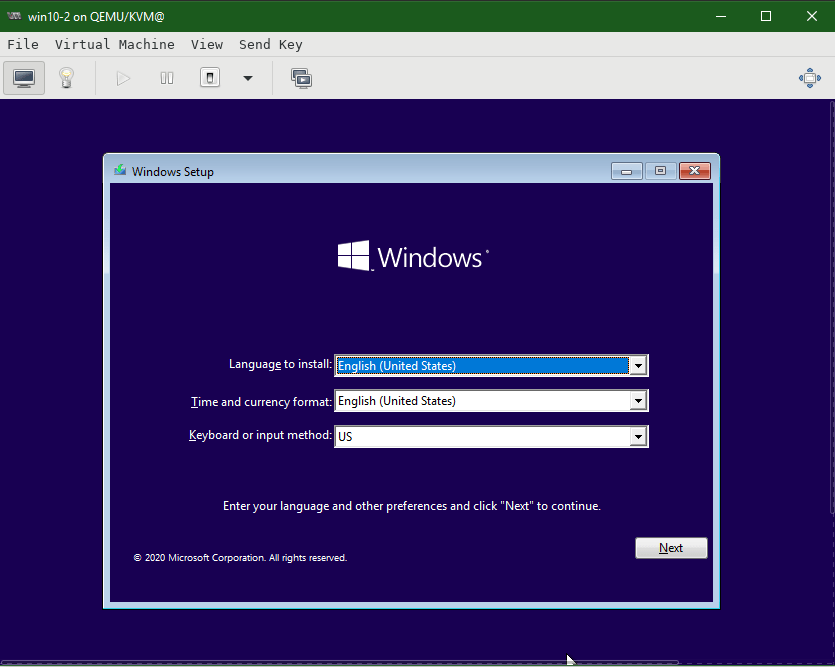
We are good to go ahead with the Begin Installation and Windows Installer will appear. Click Next
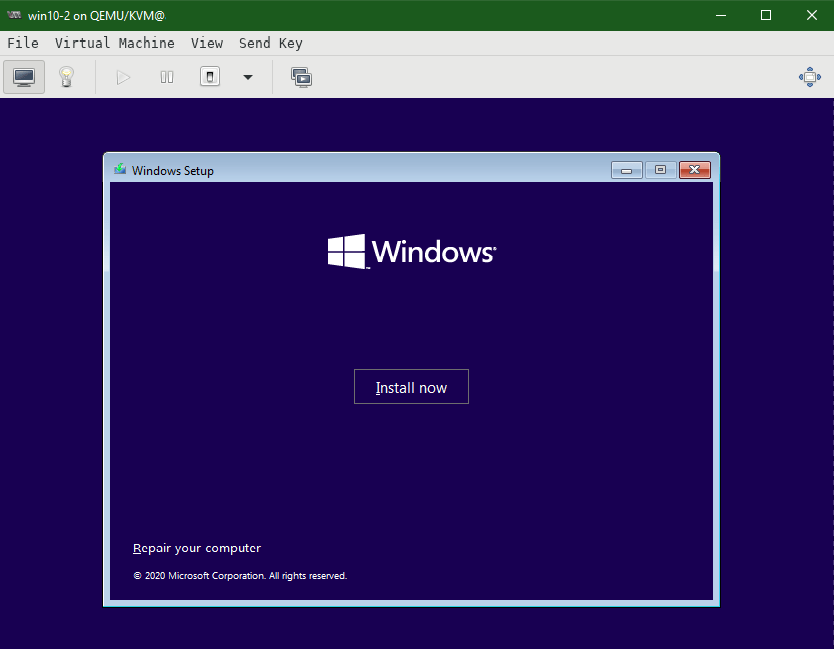
Click Install now
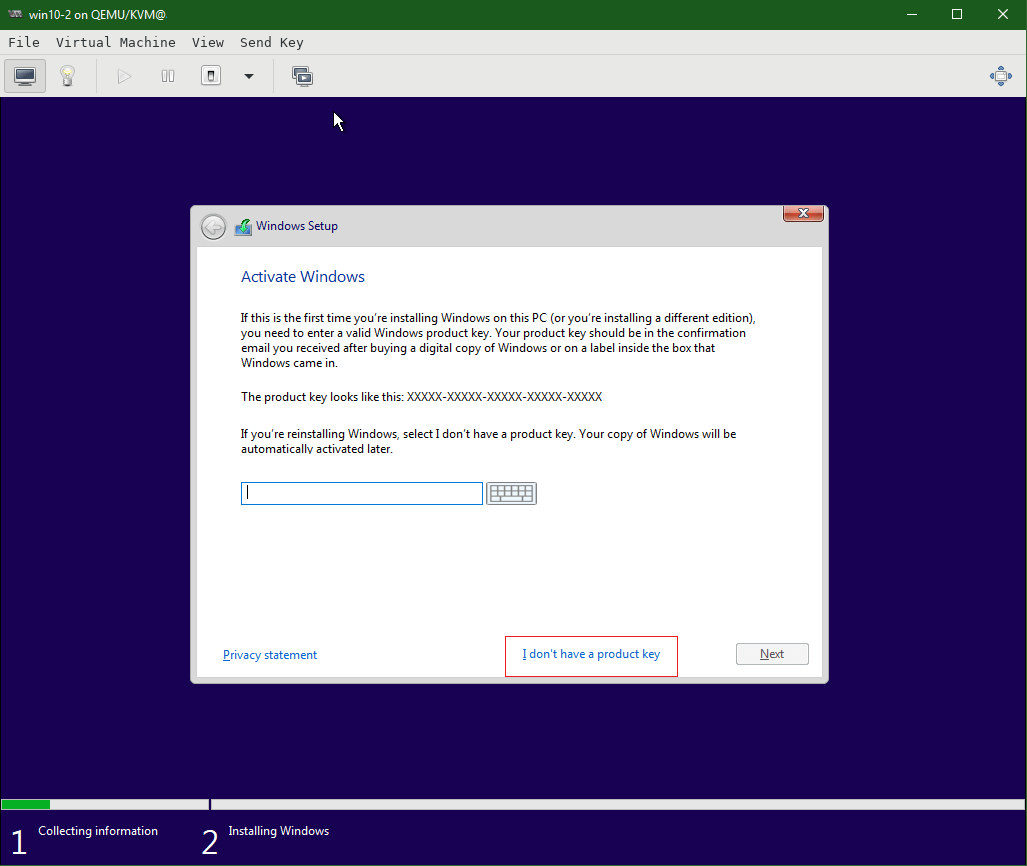
Windows Setup – Click I don’t have a product key
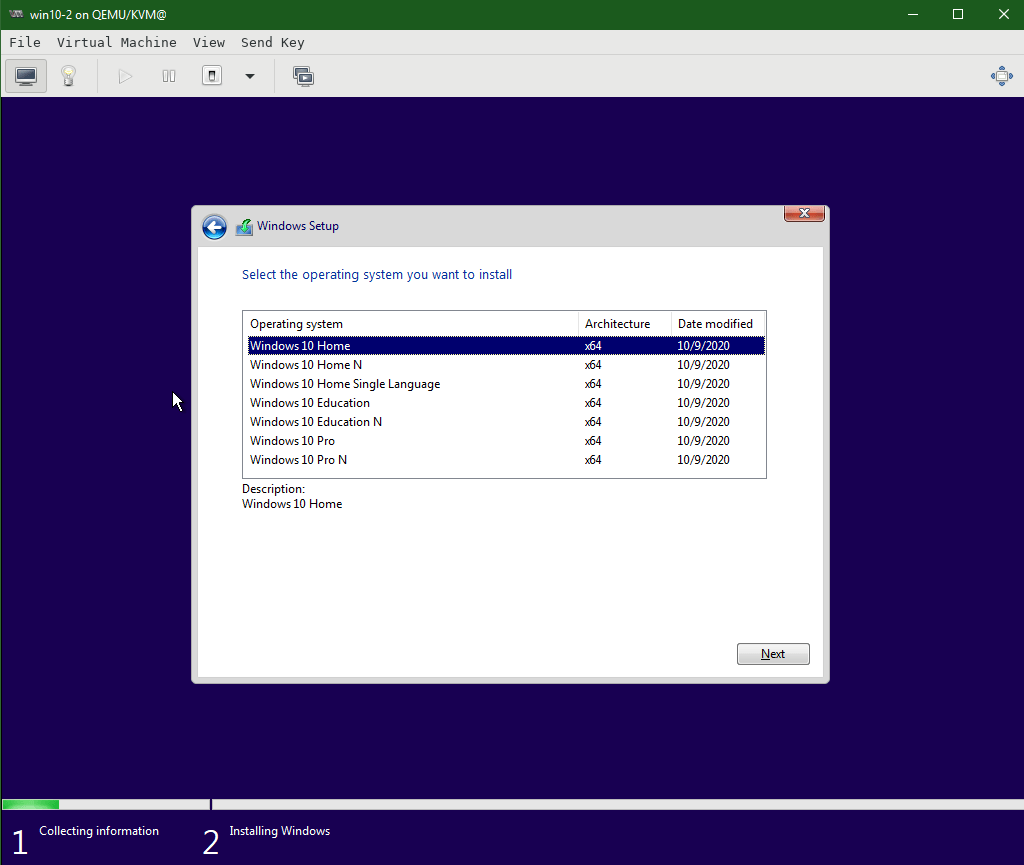
Windows Setup – Select Windows 10 Home
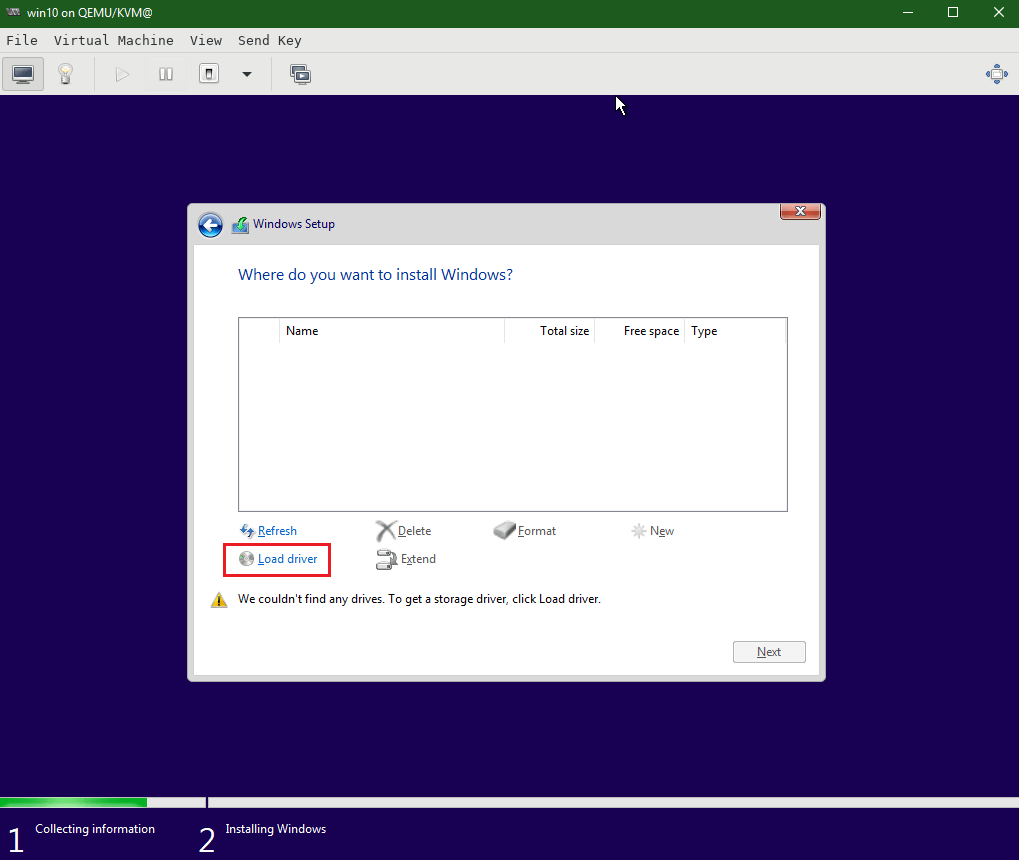
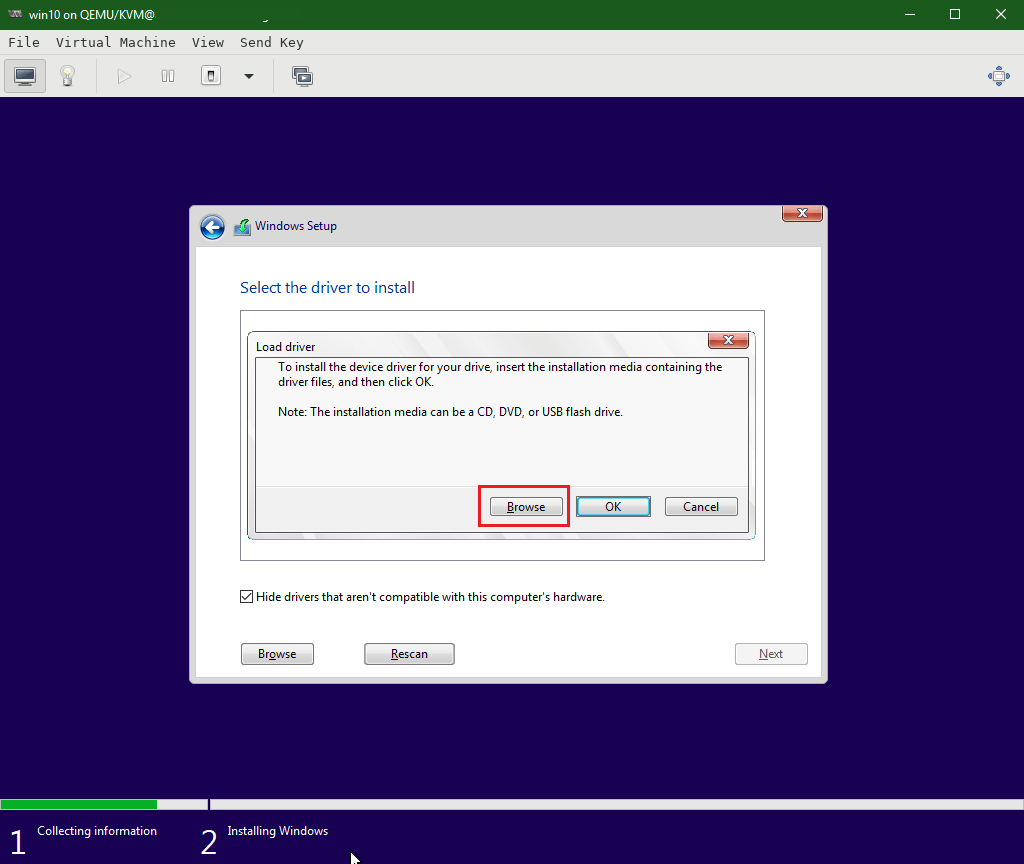
By default, Windows doesn’t discover the virtualized hard disk without drivers.
Click Load driver
Click Browse
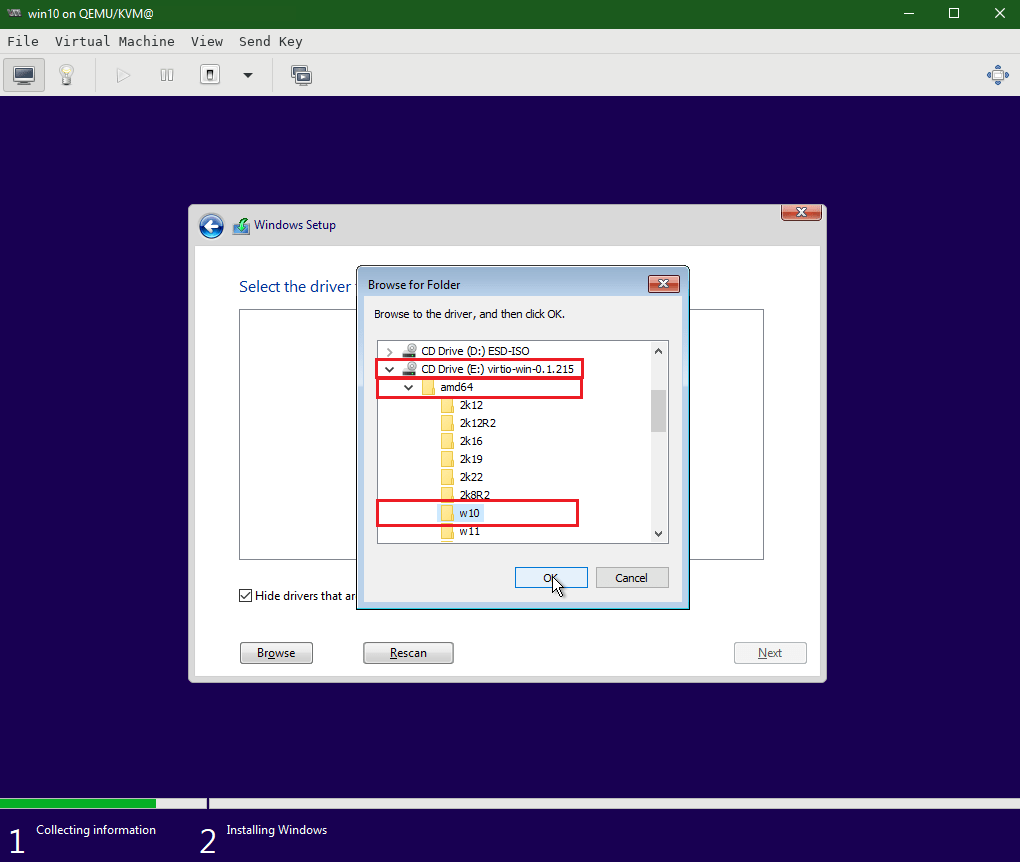
Select amd64 > w10 (for windows 10) under the VirtIO CD drive mounted earlier.
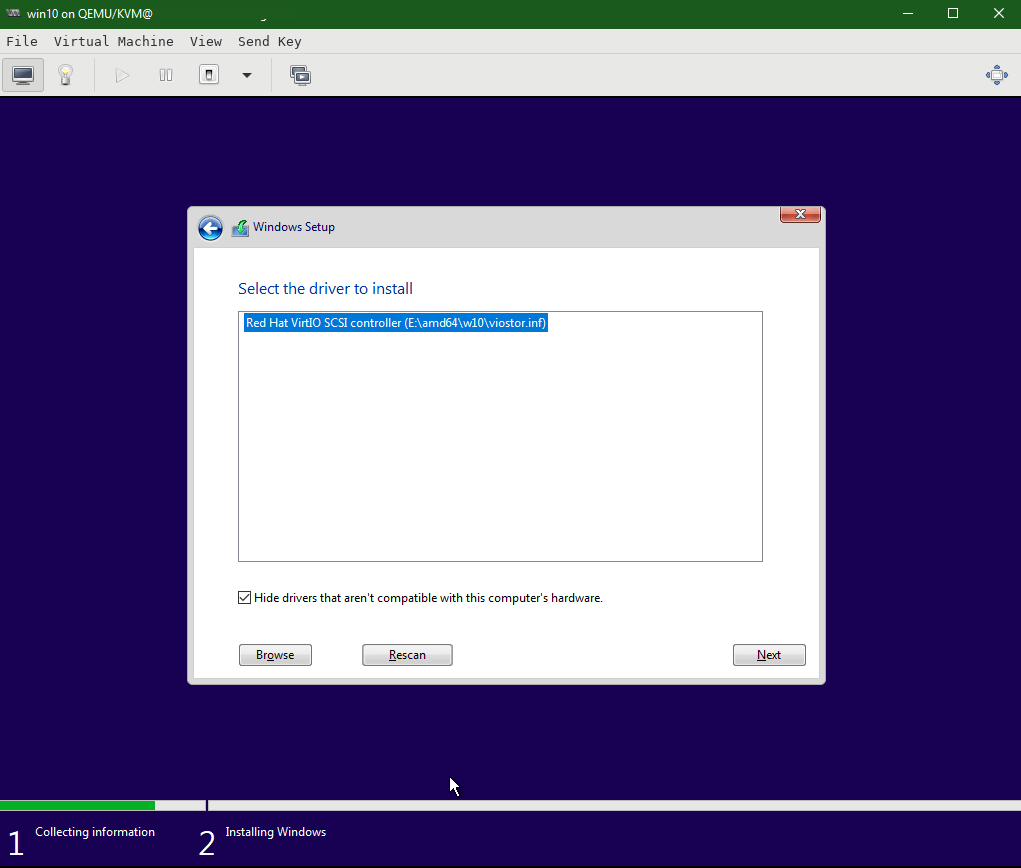
Install the Red Hat VirtIO SCSI controller driver
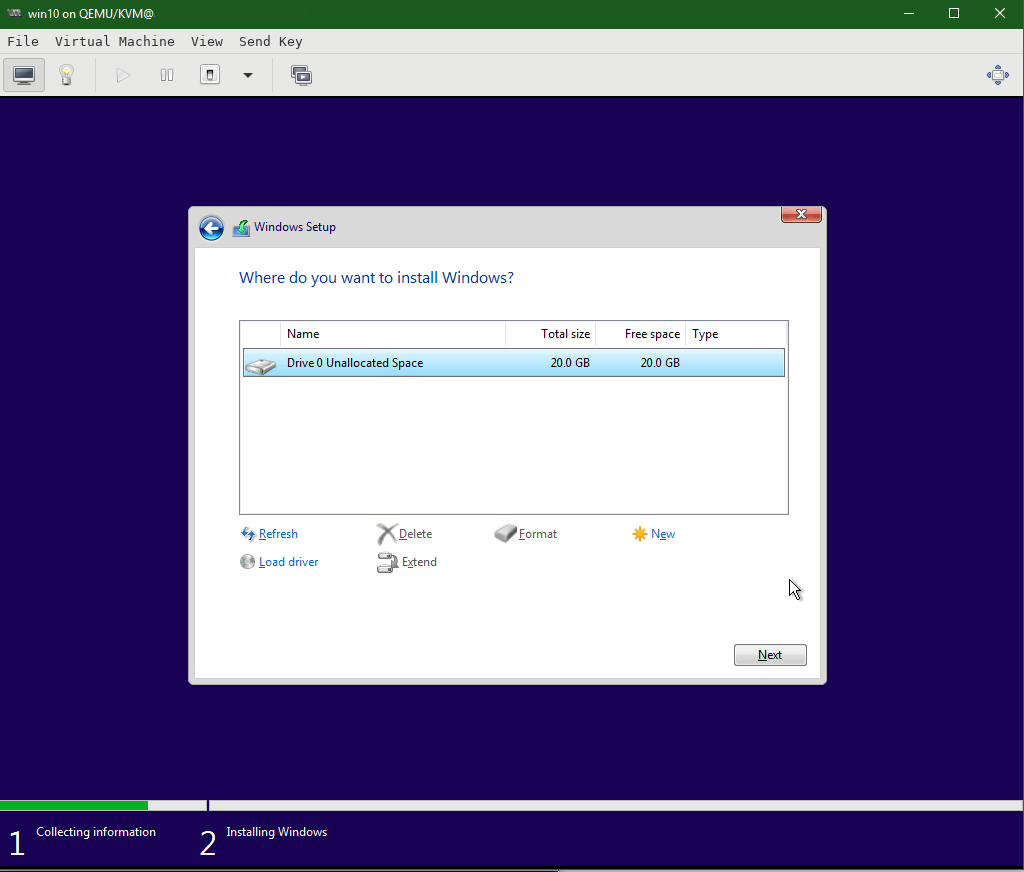
Once the Red Hat VirtIO SCSI controller driver is successfully installed, the Virtual Hard Disk shall be visible to install the Windows OS. Click Next.
Windows installer shall start installing Windows. It may take a while to complete the Windows installation and may reboot several times during the installation. You’ll be presented with a series of Windows Setup screens as below:
- Select your country
- Keyboard Layout type
- Want to add a second keyboard layout? – Skip
- Let’s connect you to a network – I don’t have internet
- There’s more to discover when you connect to the internet – Continue with limited setup
- Who’s going to use this PC?
- Set the username and password and series of security questions
- Choose privacy settings for your device
- You can configure according to your needs
- Let Cortana help you get things done – Not Now
Relax as Windows takes a while to prepare the system.
Install Red Hat VirtIO Drivers
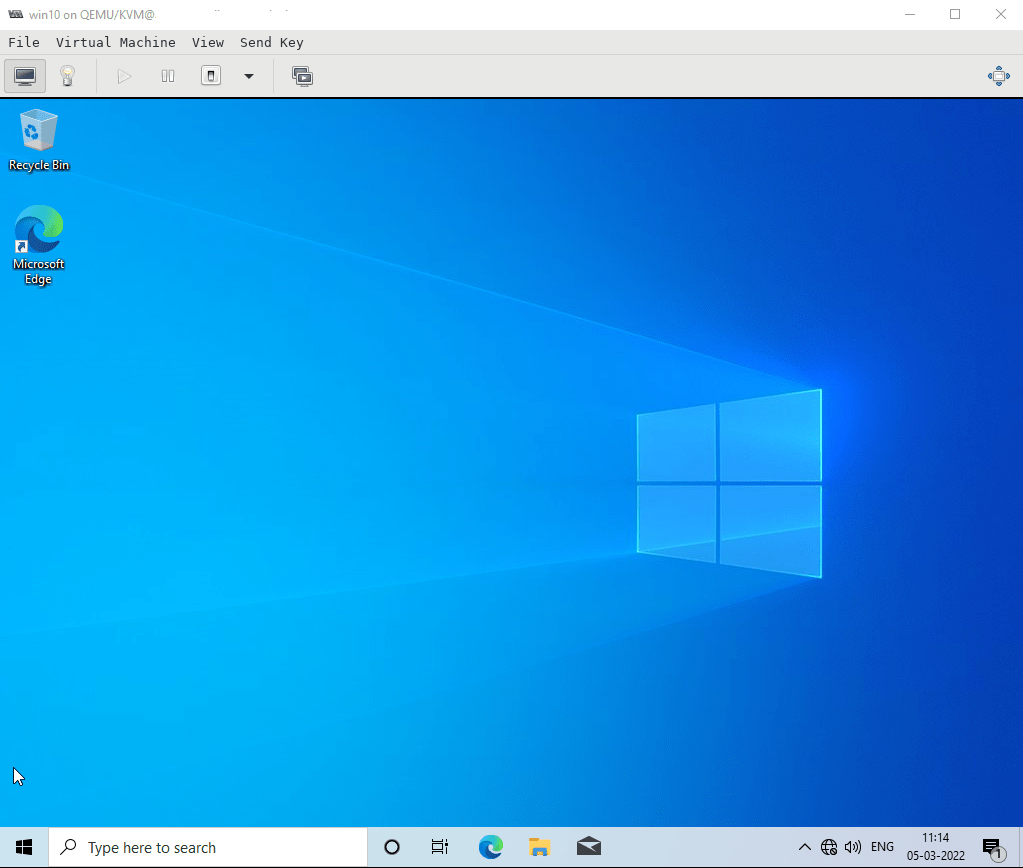
After successful installation, you’ll be presented with a login screen
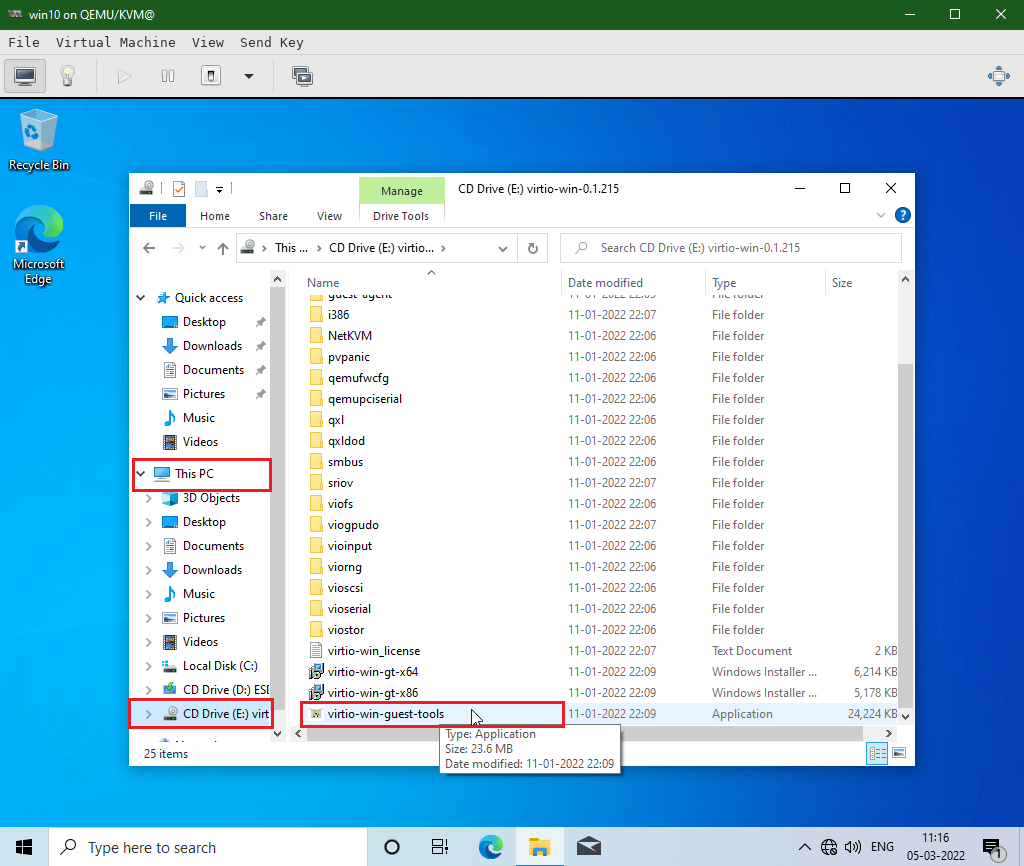
Navigate to VirtIO CDROM Drive inside VM.
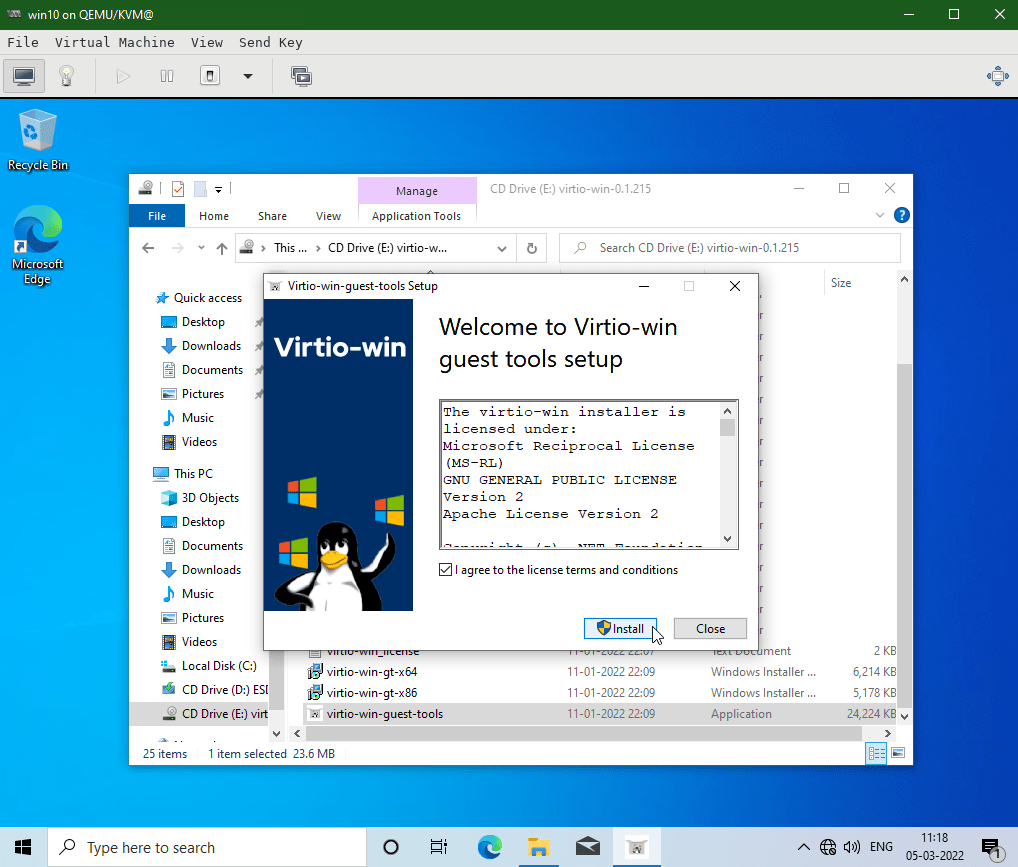
Double click on virtio-win-guest-tools executable to install all the necessary drivers for the Windows OS to use Virtual Hardwares.
After successful installation of the VirtIO drivers, your network will get activated and you are good to use the internet now.
Prepare the Windows guest OS for Cloud Use
Now that the guest OS is installed, we must configure the system for use in a Cloud environment. Cloudbase Solutions has developed Cloudbase-Init which is the Windows equivalent of the Cloud-Init project used on most OpenStack Linux images.
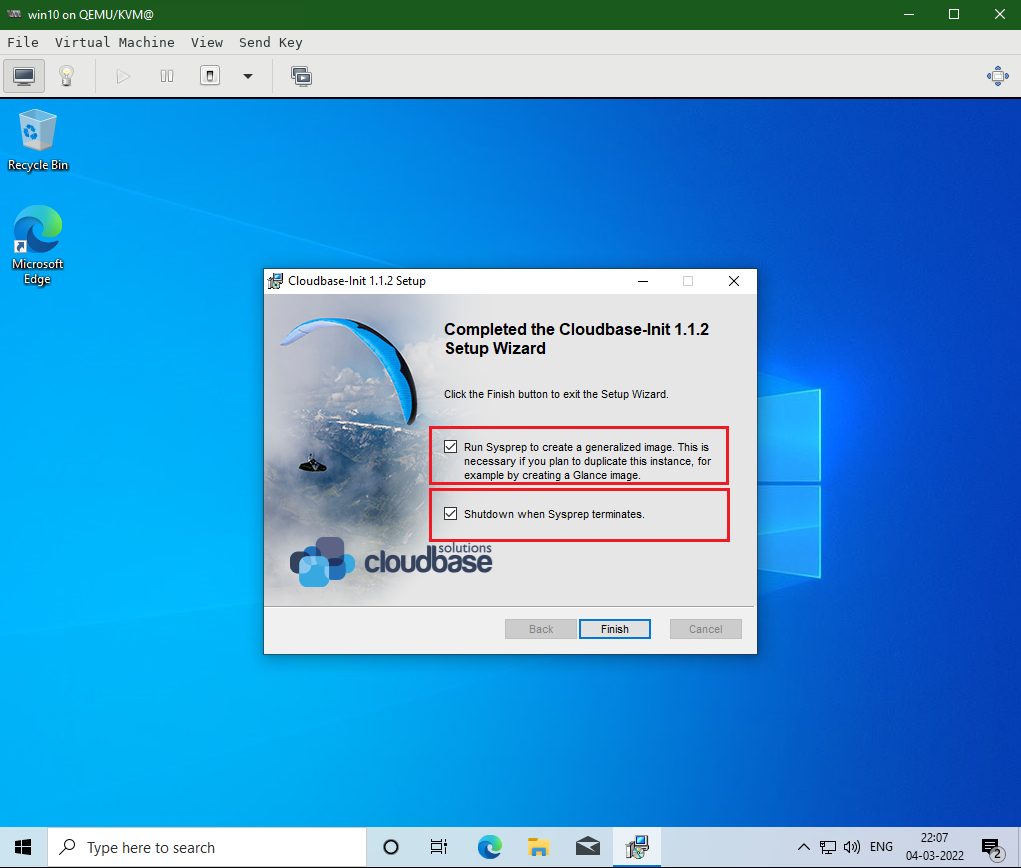
Download the Cloudbase-init and install it on the newly created Windows 10 VM instance. Leave the default options during Cloudbase-init installer and Install. Before the finish of the Cloudbase-init installer make sure you selected both the checkboxes.
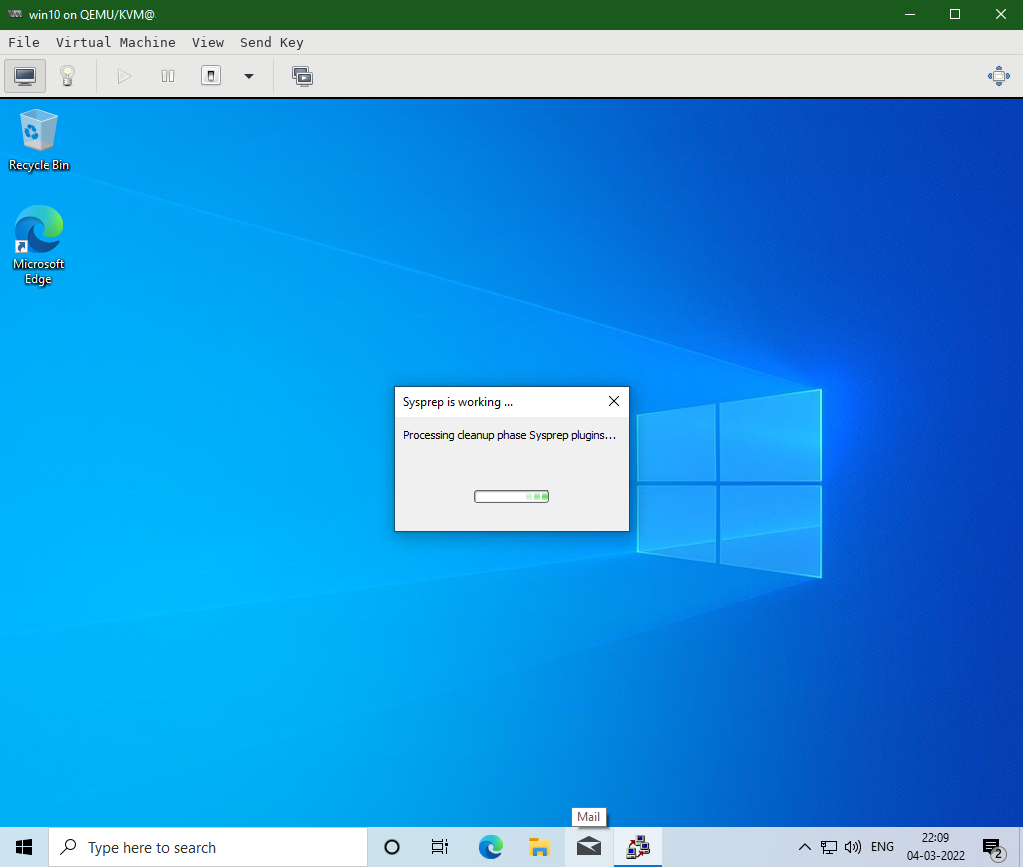
Run Sysprep to create the generalized image: checked
Shutdown when Sysprep terminates: checked
Click Finish and Sysprep will run for a while and automatically shut down the system.
Now the Windows 10 QCOW2 image at the location /var/lib/libvirt/images on the server is an OpenStack enabled Cloud Image.
However, when using Windows 10 QCOW2 image in OpenStack, had to wait for a long time for the image to boot up. This was because of an error in Windows unattend file configuration. Follow the article: How to fix Windows could not parse or process the unattend answer file for Pass Specialize to solve the issue and now the Windows 10 QCOW2 image is ready to be deployed in OpenStack Cloud.
Proceed further to create a Windows Image with Autologin configured so that the user need not manually provide the username and password for every bootup. Export the Windows 10 QCOW2 image to be deployed in OpenStack Cloud with has an Autologin feature enabled!

