Google recently launched its new Android Studio for developers during Google I/O event. Soon after its launch, we received mails from our readers to write few How-To articles about Android Studio. As requested, we wrote how to start with Android Studio and also seen few quick fix if you were facing problem in launching the application or SDK problem while creating a new project. Today we’ll see how to create a simple Android application, that will feature ‘Drawable’ type image, dynamic text field and tap event listener. Ok! Get your Android studio ready, we are about to start now!
Creating a new Project
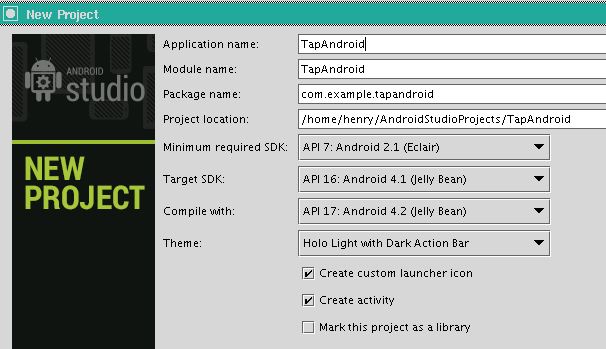
Step 1: Click File > New Project
Step 2: Enter the Application name as “TapAndroid” and leave the rest unchanged.
Step 3: Choose “Minimum required SDK” as “API: 7 Android 2.1 (Eclair). It means, your app will be compatible to run from Android 2.1 version.
Step 4: Choose ‘Target SDK” as ‘API 16: Android 4.1 (Jelly Bean)’. It means, your app will be compatible to run on Android versions starting from 2.1 to 4.1 Jelly Bean.
Step 5: Choose ‘Compile with’ as ‘Android 4.2 Jelly Bean’
Step 6: Click Next and follow the wizard leaving rest as default.
Edit the App layout
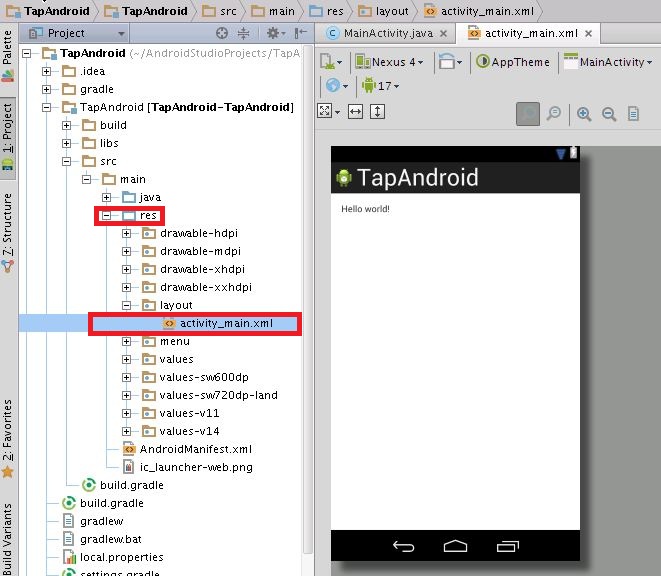
As of now the app will have a simple layout, which is defined in main.xml file located under ‘res > layout‘. To access that, click on the project tab located on the left side of the application and drill down to res > layout and double click ‘activity_main.xml‘ file. The application will open a graphical view of the app’s layout; where you can edit the layout and widgets window on the left side of the application.
Adding ImageView Widget and Drawable folder
Remove the existing text field ‘Hello World!” and add a new ImageView widget. To do that, just right click on the text field and click Delete. Now drag and drop the “ImageView” widget from the palette of widgets located on the left side of the graphical view. In case if you don’t see the widget window opened already, click on the “Palette” tab. You have added an ImageView widget to the app layout, but haven’t associated any image with it. To do that, you will have create a drawable folder under ‘res’.
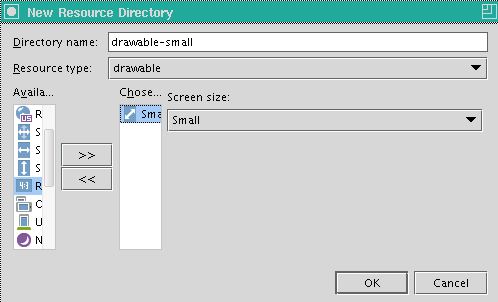
Step 1: Head on to the project tree and right-click on the ‘res’ directory and click New > Android Resource Directory.
Step 2: Provide Directory name as ‘drawable-small” and choose Resource type as ‘drawable’ and select the size as “Small” and click Ok.
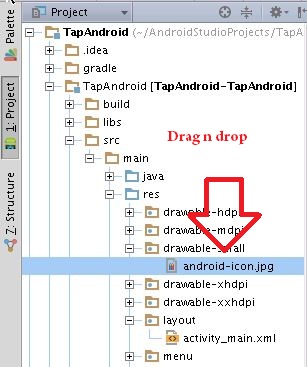
Step 3: Now choose the image that you wish to add to the app, drag & drop it into the drawable folder within the application. Alternatively you can choose to copy the desired image into the drawable folder located inside the project location: For instance, my location is as below
//home//henry//AndroidStudioProjects//TapAndroid//TapAndroid//src//main//res//drawable-small//
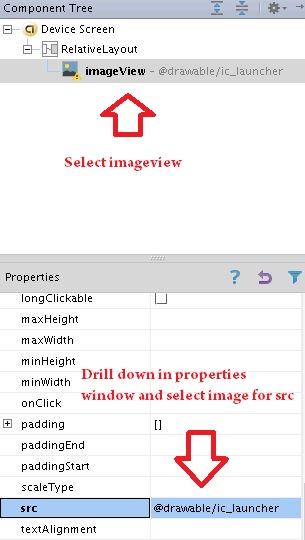
Step 4: Select ‘imageview’ in the component tree (located on the right side of the graphical view) and scroll down in the ‘properties’ window located at the bottom and locate src. Click on the button located on the right to the ‘src’ field and choose the image.
Step 5: Lets add ‘Plain TextView’ component to the app by dragging it from the Palette window. By default the component will have a text as ‘New Text’. To change that, we have to create a String resource.
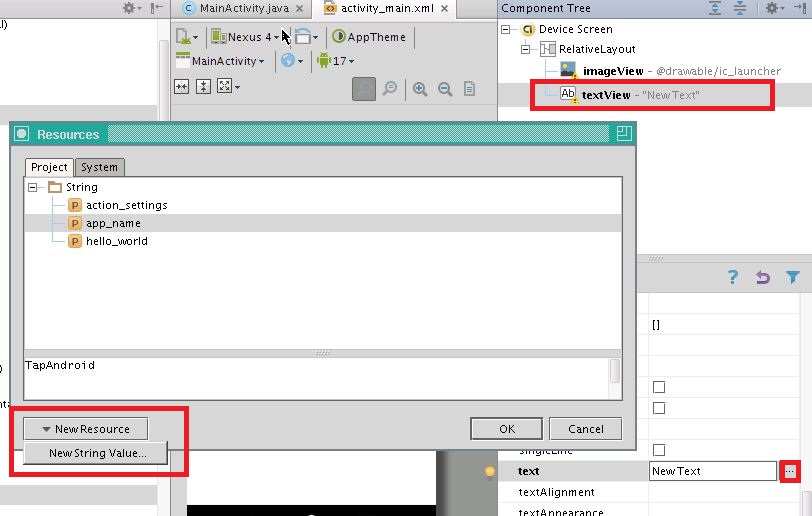
Step 6: Select ‘textview’ from the component tree and locate for ‘text’ attribute in the properties window. Click the button located on the right side of the text attribute to launch the “Resources’ dialog and click ‘New Resources’ > New String Value.
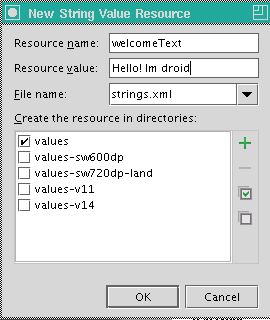
Step 7: Enter the values as show in the below image and click Ok.
Let’s make the app interactive now. For instance, whenever the android icon is tapped, the below text field should starting counting the tap.
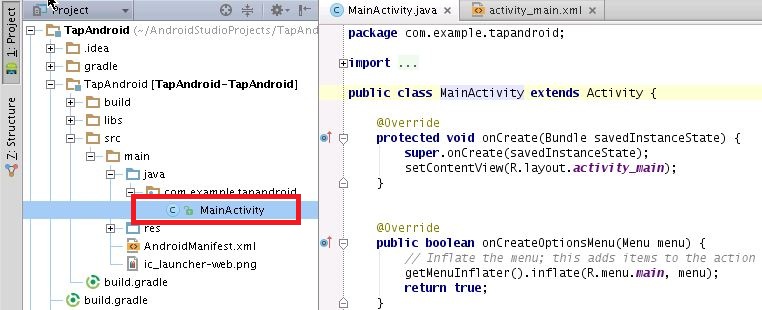
Step 1: Click the Project tab and drill down to TapAndroid > src > main > java > com.example.tapandroid and double click MainActivity
Step 2: Lets add reference to the visual elements created above. To do that, copy the below lines and paste it under ‘public class MainActivity extends Activity’.
privateTextView message;privateImageView droid;
And the code should looks as below,
publicclassMyActivityextendsActivity {
private TextView message; private ImageView droid; // More code goes here ...}Step 3: Create a method named ‘InitializeApp’ under ‘onCreate’ method and paste the below lines into the ‘InitializeApp()’/
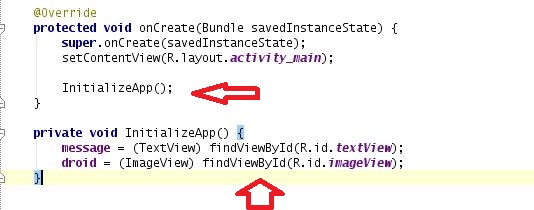
message = (TextView) findViewById(R.id.message);droid = (ImageView) findViewById(R.id.imageView);The code should as below,
privateView.OnClickListener droidTapListener;
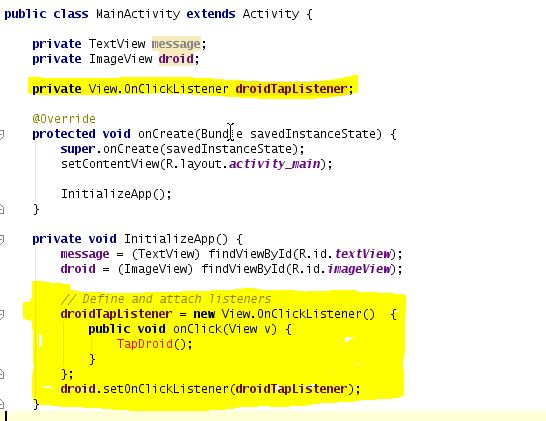
Now copy the below code and paste it into the InitializeApp method.
// Define and attach listenersdroidTapListener =newView.OnClickListener() {
publicvoidonClick(View v) {
TapDroid();
}
};
droid.setOnClickListener(droidTapListener);
Finally the InitializeApp() method should look as below,
The TapDroid method just counts the times you touched the image and displays a summary message. You add a new private member to the MainActivity class to count clicks:
public classMyActivity extends Activity
{
private TextView message;
private ImageView droid;
private View.OnClickListener droidTapListener;
private int counter = 0;
// More code goes here ...
}
Now create ‘TapDroid’ method as below,
private void TapDroid()
    {
        counter++;
        String temp;
        switch(counter)
        {
            case 1:
                temp = "Once";
                break;
            case 2:
                temp = "twice";
                break;
            default:
                temp = String.format("%d times",counter);

        }
        message.setText(String.format("you tapped me %s", temp));
    }
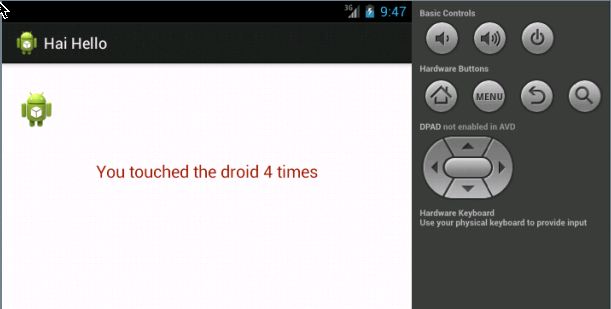
Save the project and Run it. You should see an application as below,

