What we all know about Recycle Bin in Windows? It’s a basket where all the deleted files resides and later we remove or restore those. But there are few tricks that can do more to your Recycle Bin like moving it to the system tray, investigating the files stored in it, maximize its size, deleting only the old files and disabling the confirmation message. Well! I am not leaving you with those titles alone, but will take you through the steps on setting up those tweaks.
NOTE: Use the numbers displayed below the title of this article for navigating from tip 1 to 5.
Tip #1: How to investigate the deleted files in the Recycle Bin?
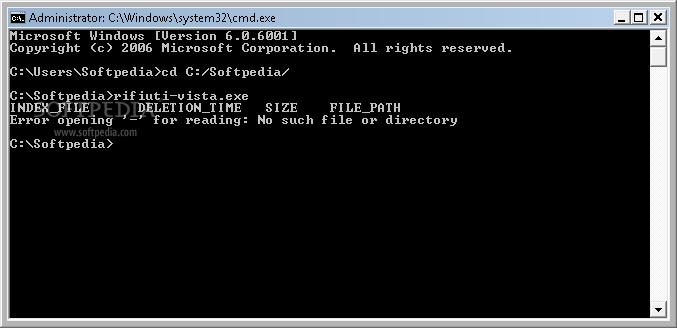
Sometimes we might need to analyze the files in the recycle bin. For instance, many computer crime investigations require the reconstruction of a subject’s Recycle Bin. To do that we need a tool called “rifiuti2”. This tool analyzes the Windows Recycle Bin INFO2 file. It analyzes each file and displays information like their names, deletion times, original paths, and sizes. The tool is available for download from its official site and it is available for Windows vista and Windows 2008. Interestingly the tool supports widows file names in any language and can also output the analysis as XML. It requires Cygwin to be installed for using the command line.
This tool is a must try, if you want to perform any forensics on your Recycle Bin.
Tip #2: How to put recycle bin on System Tray?
This tip will make your recycle bin more accessible, i.e., placing it on the system tray next to your system clock. A simple tool called “Minibin” is a free recycle bin tool that resides in the system tray. This tool comes in handy when you want to hide the recycle bin from the desktop or making it more accessible from the system tray.
The Minibin is configurable – you can allow or disallow confirmation dialogs, progress dialogs and system sound playback. It doesn’t require administration privileges.
Checkout the video below for more information,
Tip #3: How to disable the confirmation message?
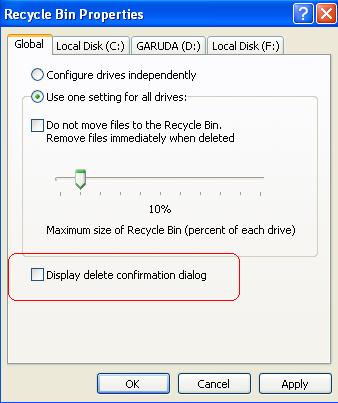
If you don’t like to see this ““Are you sure you want to move this file to the Recycle Bin?” message box, you can always disable that. To do that, right click on the Recycle Bin icon on your desktop and click properties. In the properties dialog, uncheck the “Display delete confirmation dialog“ option.
Tip #4: How to maximize the size of the Recycle Bin?
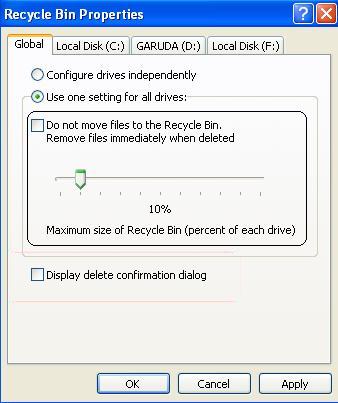
Right click on the Recycle Bin and click properties. In the properties dialog box, you can change the Recycle Bin’s maximum size. Remember if you delete files that are larger than the maximum size of the Recycle bin, the files will skip the Recycle Bin and gets deleted immediately. This dialog box will also let you to disable the files moving to recycle bin and delete automatically. But I don’t certainly prefer this, as the files deleted by accident will be lost forever.
Tip #5: How to hide the Recycle Bin from the desktop?
Love to keep your desktop clean? You can always hide the recycle bin from the desktop. To do that, right click on the desktop and select “Personalize” and click “Change desktop icons” on the Personalization dialog window. Uncheck “Recycle Bin” checkbox. That’s it, Recycle bin will be no more seen on your desktop. But of course, the functionality of the recycle bin will be same as before.
Let us know if you have any tips related to recycle bin in windows.


