Did you notice the missing option in the right click context menu that lets you to scan a file or a folder with Windows Defender? If you don’t find, the reason was because of Windows Defender that replaced Microsoft’s security Essentials in Windows 8 and that doesn’t feature an option to right-click and scan a file or a folder. If you ever need one such option, then here’s the trick. Basically there are two ways that lets you to add “Scan with Windows Defender” to your right-click context menu. Lets see both the options,
Trick 1: Download and run the .reg file.
This option is very simple, you will have to download and run the “AddWindowsDefenderToContextMenu.reg” – registry file.
Trick 2: Manually add the option to Context Menu
Step 1: Go to the Start Screen and type “regedit” and hit the Enter key.
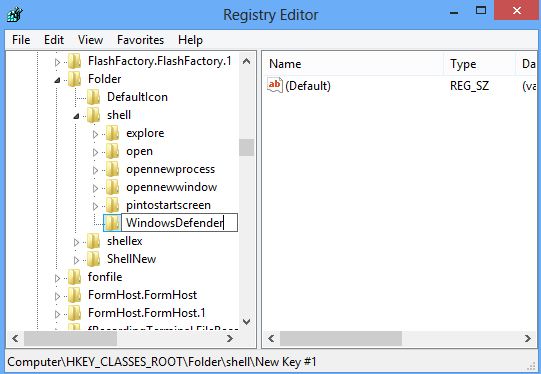
Step 2: In Registry Editor, navigate to the below location using the tree menu located on the left pane.
HKEY_CLASSES_ROOT\Folder\shell
Step 3: You will have to create a New key under the “Shell”. To do that, right-click the Shell key, point to New and create a new key in the name “WindowsDefender”
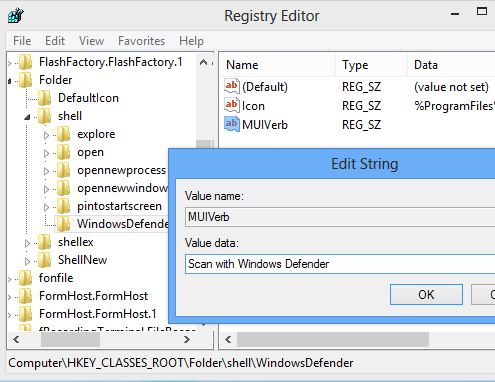
Step 4: Once the new key is created, select “WindowsDefender” key in the left pane. Create a new String value on the right pane as “Icon” and double click to enter the below value,
%ProgramFiles%\\Windows Defender\\EppManifest.dll
Step 5: You will have to create another key as “MUIVerb“. To do that right click on the right pane and create a new String value. Name it as “MUIVerb” and double click to enter the below value,
Scan with Windows Defender
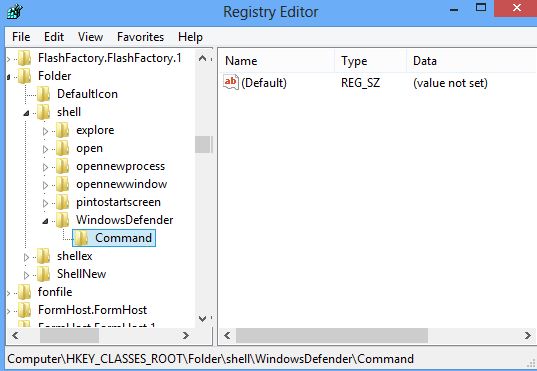
Step 6: Right click on the “WindowsDefender” key and create another key as “Command“. Select the Command key.
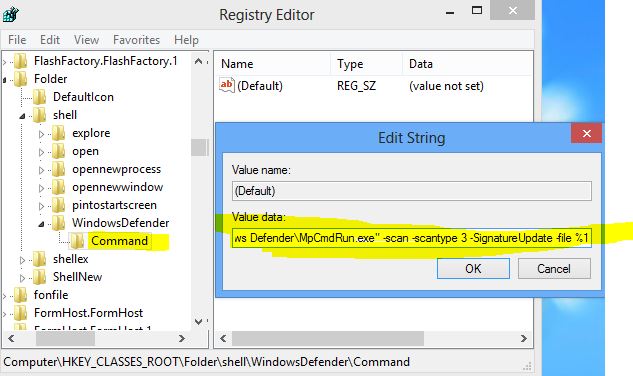
Step 7: Now on the right pane, double click on the ‘Default’ value and enter the below value,
“C:\Program Files\Windows Defender\MpCmdRun.exe” -scan -scantype 3 -SignatureUpdate -file %1
The step 7, will invoke the command prompt to run the scan and will disappear by it self. You will be alerted if any problem was found with the file that you chose for scanning. That’s it!
If you are opting to tryout the Trick #1, then download WindowsDefenderContextMenu.zip


