
One of my client has requested for an SSL certificate from Godaddy, but haven’t verified the Certificate Request. Hence, Godaddy has put the certificate request on hold and my client was worried about the site’s reputation (because the current certificate was expired and my client was expecting a new one). Well, this tutorial is for my client to let her know that Godaddy needs the certificate request to be verified.
How to Verify SSL Certificate Request in Godaddy
After making an SSL certificate request, Godaddy requires you to verify that you really own the domain for which the request was made. To verify ownership, the provider offers two options – by uploading a HTML page with an unique code sent by the provider and via DNS txt record.
Here are the steps to verify the ownership of the domain.
Step 1: Login to Godaddy with your credentials
Step 2: Lookout for "SSL Certificates" section and click "Manage" button.

Step 3: If your certificate request was not verified, then you will see a screen as shown below:
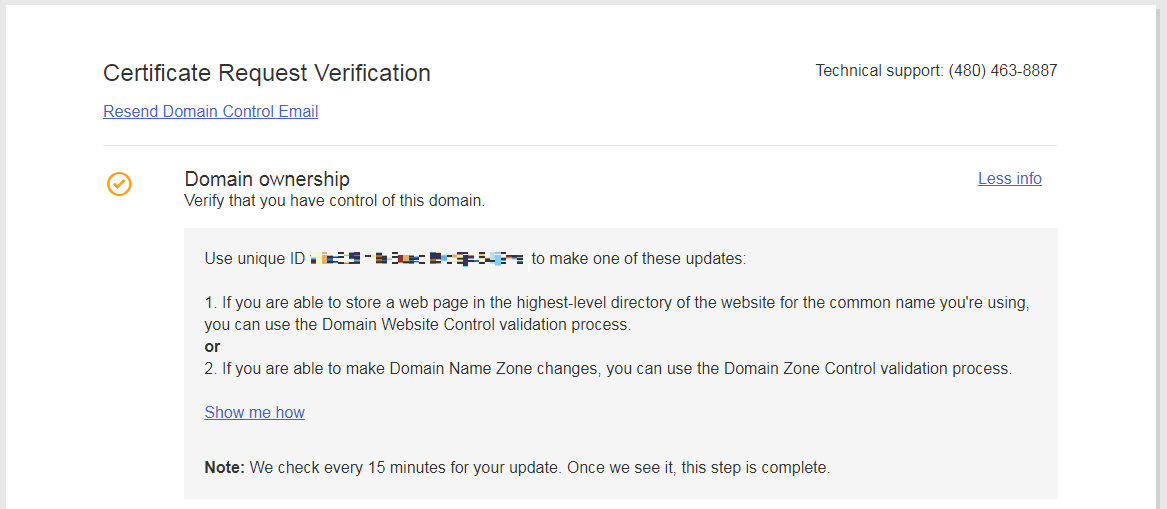
Step 4: Lookout for the unique ID displayed in "Certificate Request Verification" page and copy it. Alternatively, lookout for an email from Godaddy with a line "Your unique ID for these methods is [uniqueID]."
Step 5: In order to perform HTML file verification, create a new HTML file named "godaddy.html".
Step 6: Paste the Unique ID copied in Step 4 into godaddy.html file. For example, if your unique ID was “88567”, then you just need to have “88567” in godaddy.html file.
88567
Step 7: Now login to your domain and create a folder "/.well-known/pki-validation/" in DocumentRoot (in other words, inside the highest level directory of the website). To do that, you either need an SSH or cPanel access to your domain.
Step 8: Upload godaddy.html file created in Step 6 into "/.well-known/pki-validation/"
Step 9: Access godaddy.html file from your browser. Say, http://domain.com/.well-known/pki-validation/godaddy.html.
Step 10: Ensure that you are able to access godaddy.html placed on your domain. If not, repeat the steps again.
Step 11: Get back to Godaddy domain control panel and verify your domain (Repeat step 1 to 3). Upon successful verification, you should see a screen as shown below.
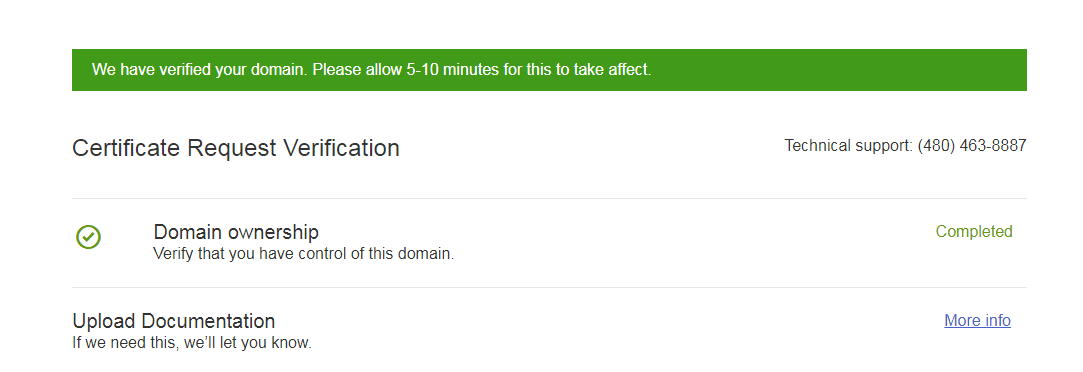
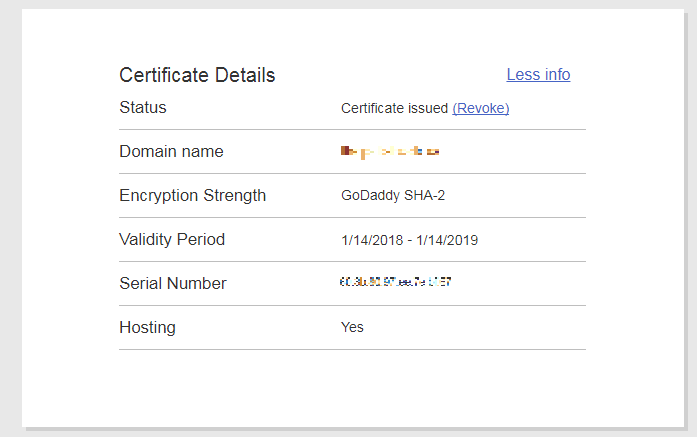
That’s it. Now your domain ownership has been verified successfully. Well, you need to wait for few minutes before the certificate is issued.
You can also verify your certificate request by creating a TXT record in DNS.
