In the era of running behind every new feature update whether you need it or not, ask any tech enthusiast that likes a minimal UI on their machine how to make an interface look cleaner and they will tell you that you should start with reducing clutter on the screen and create more blank space which gives the notion of a way cleaner UI.
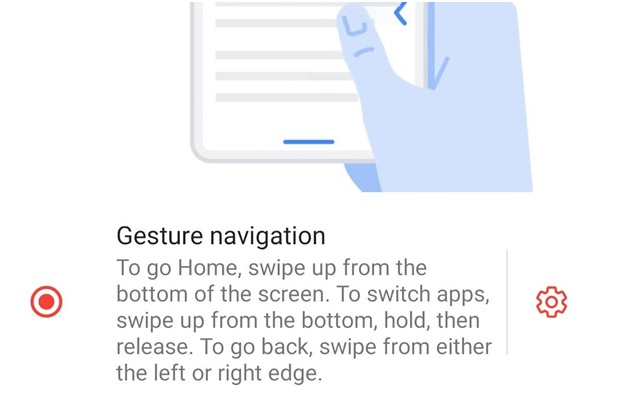
Google did something very similar to this with the launch of Android Pie (9.0) by removing the big old set of 3 navigation buttons and replacing them with a tiny Pill shaped form factor with some swipe gestures for app switching and then remodeled it entirely on Android Q (10.0) with a sleek, almost invisible home button and swipe gestures for all actions. This definitely turned heads, as Apple did something super similar by removing the physical home button replacing it with gestures at around the same time bracket.
While a few manufacturers like Xiaomi followed suit by including this in their custom operating system skins like MIUI, most people that are stuck with older operating systems on their phones are left wanting this feature. For example, the latest devices that run OxygenOS have gesture navigation but users of older OnePlus devices still have the ugly old 3 button navbar that occupies something close to 10% of their screen.
If you’re one of these users, we’ve got just the thing for you today. Even if you’re an Android 10 user (most necessarily Pixel or custom ROM, as almost everyone else, has custom skins now), you can give this a try and you’ll probably shift over to this.
The application we’re talking about doesn’t need mandatory root access – however root access does help. We’ll tell you how in the coming sections.
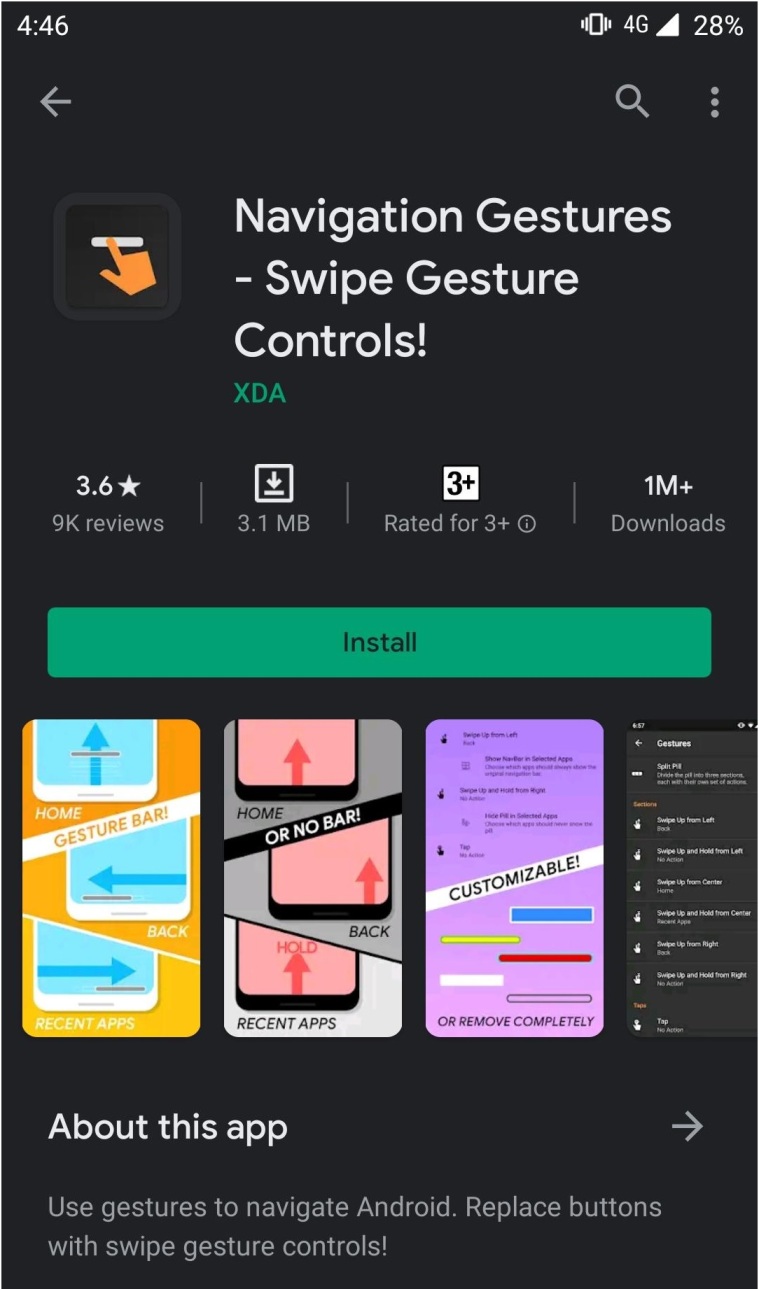
Step 1: Installation
Install Navigation Gestures by XDALabs from the Play Store.
Step 2: Granting Permissions
Once installed, simply launch the app and you will be prompted to grant a set of permissions that the app needs to provide you with the functionality you need.
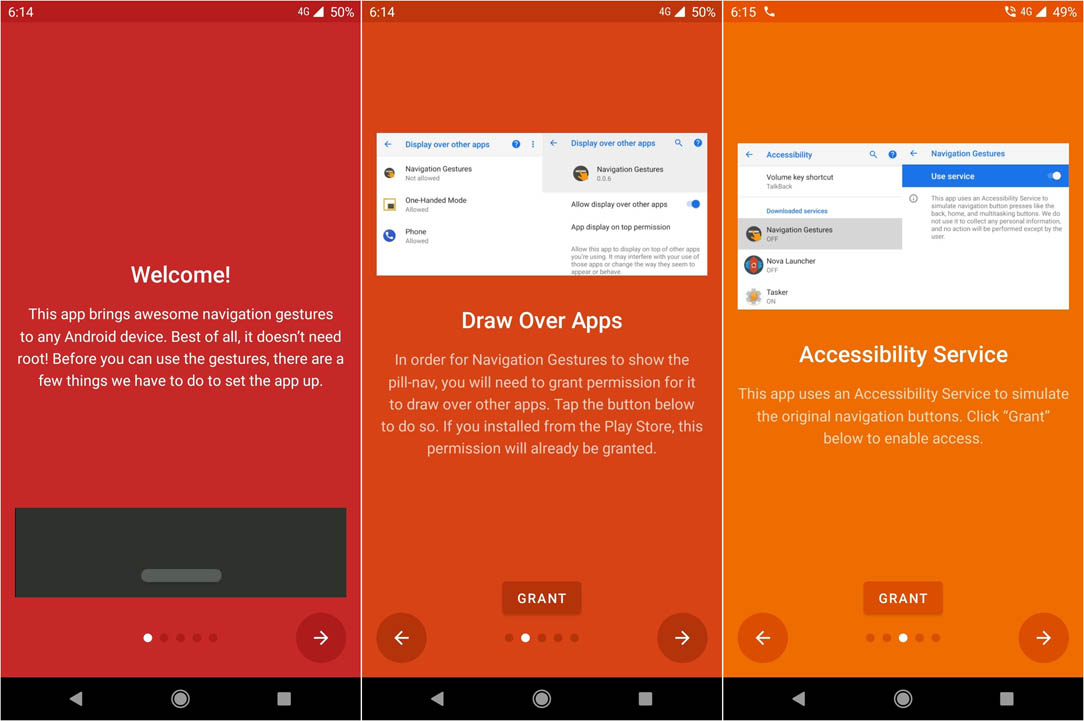
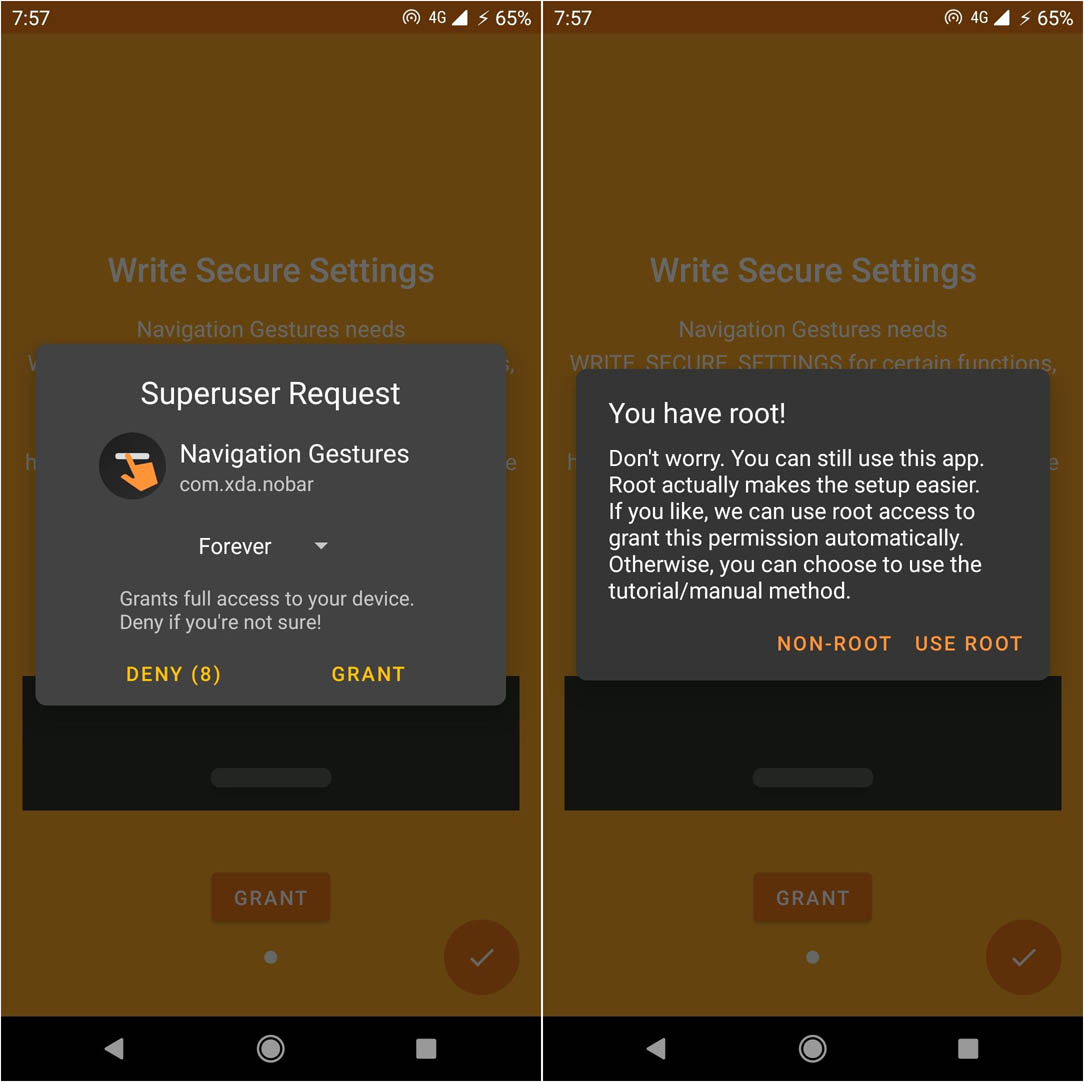
The last permission that you have to grant is what enables the app to hide your device’s original navigation bar and then place the navbar that it then emulates at that position. This is where it helps to have your phone rooted.
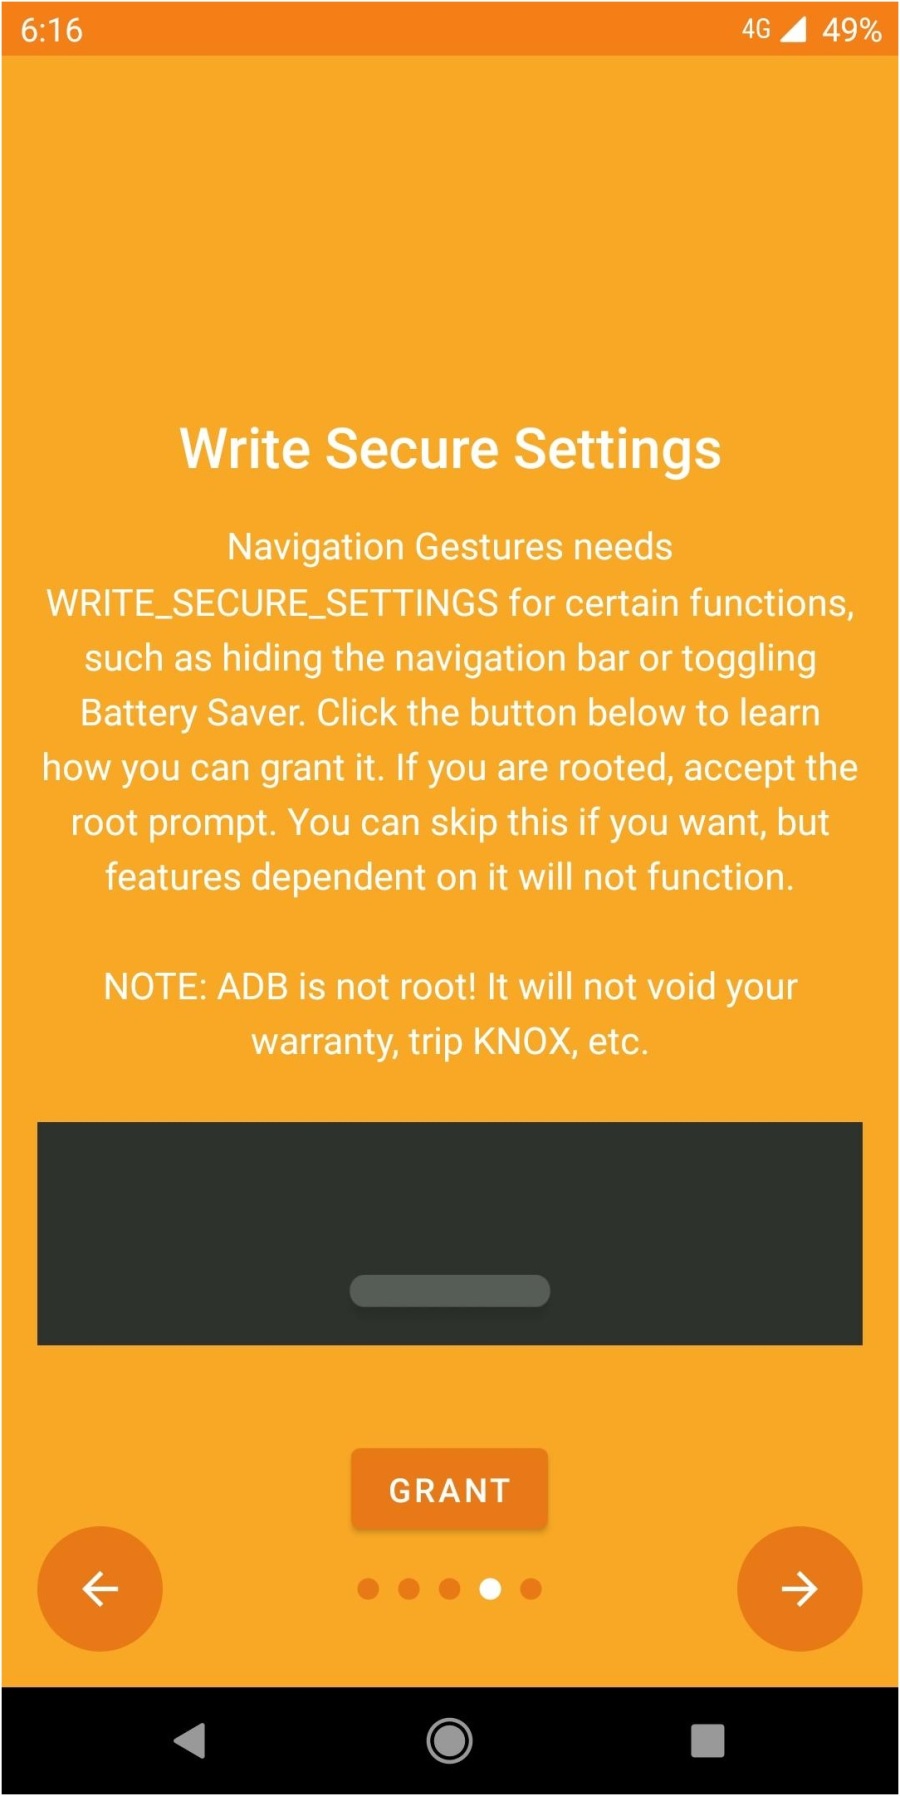
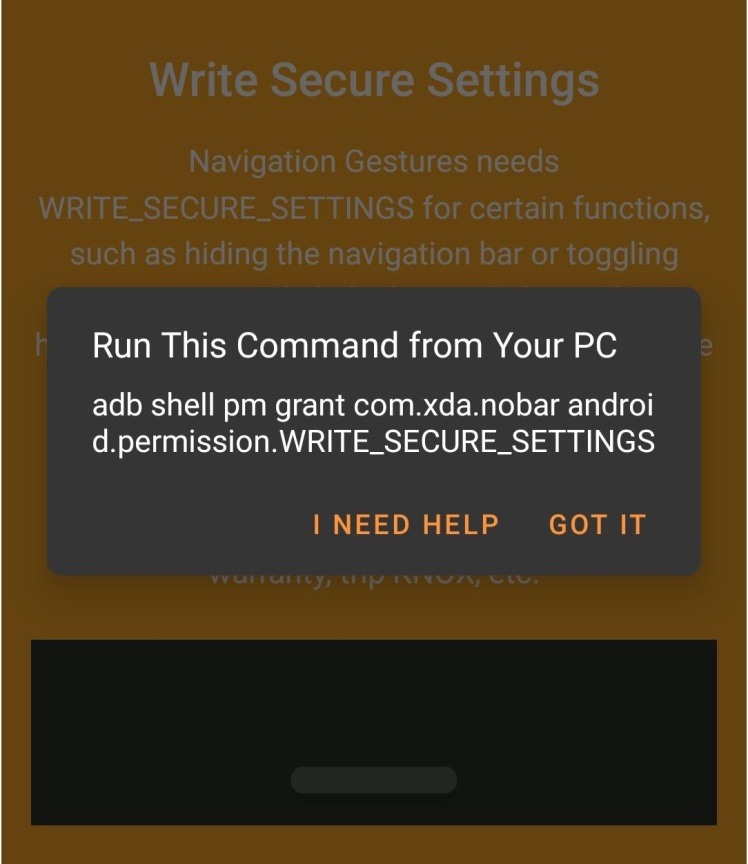
The Non Root Method
To make sure Navigation Gestures can remove your NavBar, you need to grant it permission called GRANT_SECURE_SETTINGS and what it does is it gives the app the elevated permissions like what it’d have if you granted it root privileges. This is done by running the adb script.
adb shell pm grant com.xda.nobar android.permission.WRITE_SECURE_SETTINGS
The entire script is written in a single line and executed from the command prompt. If you have no idea how to do this, the makers of the app have a quick guide video.
The Root method
If your device is rooted, you get to skip all the hassle and just grant root permissions to the app once the prompt appears and move ahead by selecting USE ROOT.
Configuring the app
Now that that’s out of the way, let’s go ahead and configure your new navbar.
Things you should toggle on the main screen:
- Enable Gesture Pill
This is your new alternate Home button - Enable Left and Right Side gestures
These are the sensory spots for back and other gestures - Hide Navigation Bar
Now tap on the little gear icon on the top right to open settings. Here you can find loads of tweaks and if you’re anything of a customization freak, you’ll enjoy the heckloads of time you’re gonna spend here, even otherwise, it’s better if you do these settings yourself by trial and error instead of following any instructions.
One noteworthy feature is the ability to backup your favorite configurations for later or to share with someone else. To do this, select Backup and Restore and you can see you can backup gestures, appearances, and behaviors of the panes either separately or altogether.
I’m sharing the baseline Android 10 interface configuration and my favorite zero-clutter configuration that does a whole lot more than what Android 10 offers. You can download these and further tweak them for personalization.
To install these, select “Restore all Settings” and locate these files on your Phone Storage.
Frankly, there’s very little limitation to what you can configure the control panes of this app to do, and if you get the premium version your limits go to practically infinite combinations. Play around in the settings section and you’ll never look back at the Native Android NavBar even if you are using this on an Android 10 device.