Bought a new Samsung Galaxy S3 and wondering how you can root it? Well, you have landed on the right page then. Today you will learn about Samsung Galaxy S3 Rooting using ODIN for windows. Before we get into the action, if you were wondering what is ODIN all about? Then here’s a quick intro to it: Odin is a windows program developed by Samsung, which can help you to root, flash, upgrade and restore your Samsung devices. Got it right? Lets move ahead and root your device.
Get ready with these…
1. Download the latest version of Odin.
2. Get the latest Samsung USB Drivers as well.
3. You will also need to download the latest firmware for your model. Once you visited the site, choose the device you own from the pull-down menu located on the left.
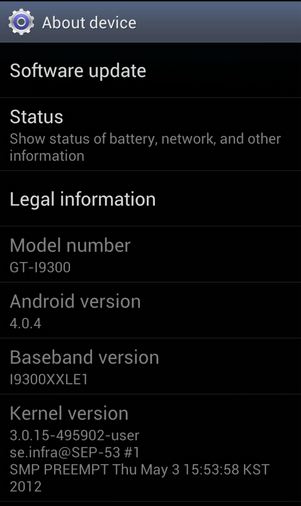
Not sure which model you own?
Just tap Settings > About Phone. You will see a screen similar to the one shown below,
4. Download CF-Auto-Root file.
5. Free ROM Manager app (You will need this to be downloaded on S3 after you gain the root. Not now!)
Here we go,
Step 1: Download and install USB drivers on your computer (well, you had downloaded already). Once the drivers are installed, reboot the PC.
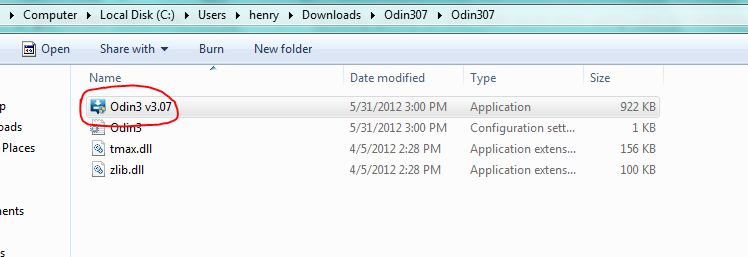
Step 2: Unzip the Odin on your desktop.
Step 3: Switch Off your Galaxy S3.
Step 4: Now, Press and Hold down “Home key”, “Volume Down Key” and “Power Button” at the same time, until you see something on the screen. The device will now boot into download mode.
Step 5: Connect your device to computer using USB cable. And go the Odin folder (we just extracted in step 2) and run the Odin application.
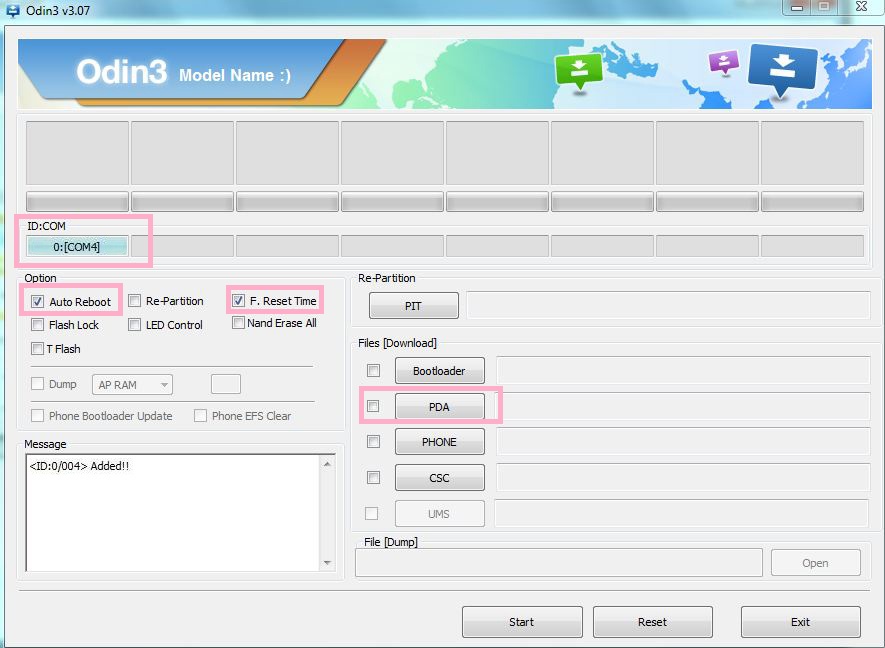
Step 6: Once the Odin app is launched, make sure you see a blue colored rectangle with COM port under “ID:COMM”. Also check “Auto Reboot” and “F. Reset Time” under Options.
Step 7: Lets flash the device now. Extract the latest firmware that you downloaded earlier.
Step 8: Click “PDA” and browse to the folder; Choose and click on the file that has extension as “tar.md5”
Step 9: Click “Start” at the bottom of the Odin to begin flashing your device. Odin will keep you updated with the progress. Once the process is completed the device will be automatically rebooted.
Step 10: Now its time to obtain the Root. Extract the CF-Auto-Root file (which was downloaded earlier). Click “PDA” and browse to the CF-Auto-Root folder and choose the file that has extension as “tar.md5“.
Step 11: Click “Start“. Once done, the device will be rebooted into Stock recovery. From there, reboot.
Congratulations, now your device has been rooted. We will install custom ROM now.
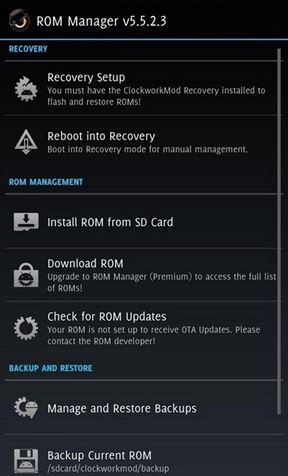
Step 12: Download and install the “Free Rom Manager” on S3. Launch the ROM Manager and tap ‘Recovery Setup‘ to install ClockworkMod Recovery.
Once the custom ROM is installed, you are done.


