Recently I bought Nexus 5 Android phone and was excited to write my first How-to tutorial about Android screencast. In order to screencast your android, the device has to be connected to your computer. Of course, there are several apps for screencasting your rooted device, but the method that I was planning to write doesn’t require any app to be installed or device rooting. Ok, now back to connecting my device to the Windows 7 laptop. Oops! Now I have a problem, the Windows did not detect my device and just thrown an error “Driver not Installed”.
I googled for few minutes and finally found the solution, which I like to share it with you all.
Step 1: Install Android SDK on Windows 7
- Just to go Android.com and download the SDK bundle.
- Once downloaded, unzip the package.
- Start ‘SDK Manager.exe‘. This step might take few minutes depending upon the speed of your computer.
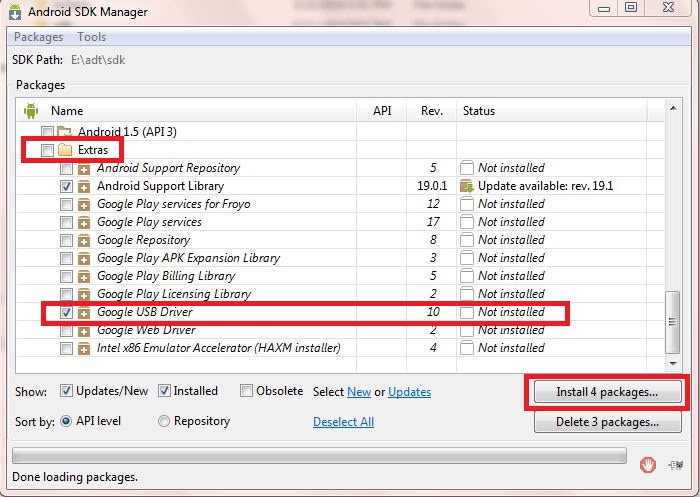
- Once the SDK Manager is launched, scroll down to expand “Extras” folder. Now, select “Google USB Driver” and click “Install <total_no_of_packages_selected> packages…” button.
- Wait until the SDK Manager completes the installation process.
- You may close the “SDK Manager”. Now you will find a new folder called ‘google’ under ‘sdk’ (unzipped folder in step 1)
Step 1: Install/Update USB driver
- Connect your device to the computer.
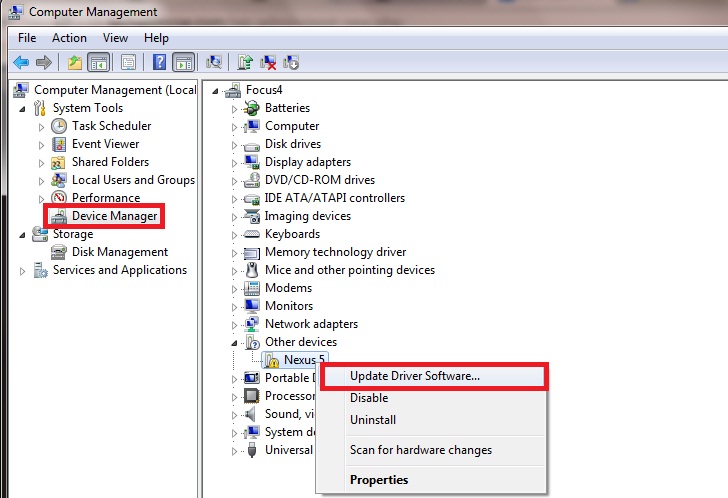
- Right click on “My Computer” and choose Manage.
- Double click “Device Manager” from the left side menu
- Right click on the yellow icon displayed next to your mobile device and choose “Update Driver Software“
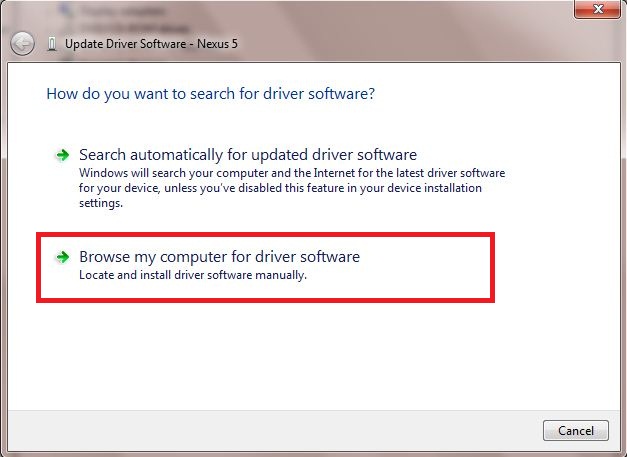
- In the next dialog, choose “Browse my computer for driver software”
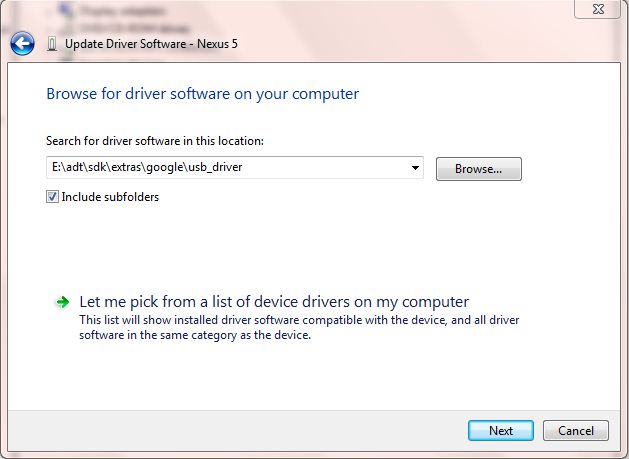
- Browse to ADT folder and select ‘adt\\sdk\\extras\\google\\usb_driver’ and click “Next”
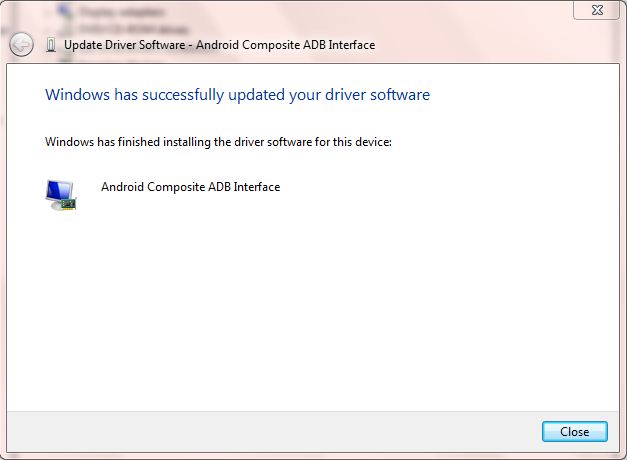
- Now Windows should install “Android Composite ADB Interface” for your device.
Step 2: Enable USB Debugging on Android
- Jump to “Settings” and tap “About Phone“
- Tap “Build Number” seven times to enter “Developer Options”
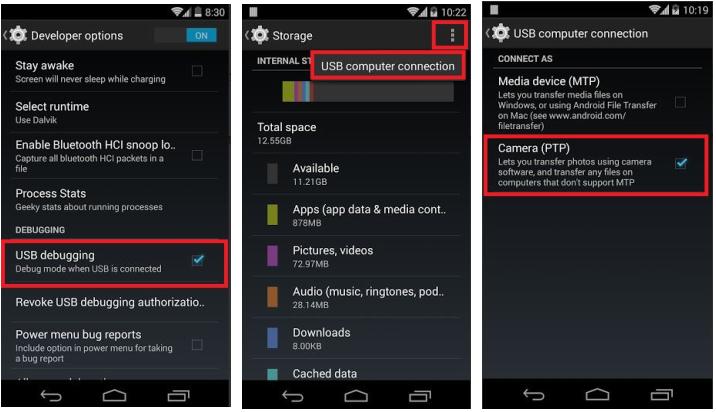
- Go back to “Settings > Developer Options” and enable “USB Debugging“
- You may also have to switch between MTP to Camera PTP. To do that, go to “Settings > Storage” and tap menu at the top and switch between “Media device (MTP)” to “Camera (PTP)”
That’s it. Now your device should connect properly to Windows.
Step 3: Verify if the device is connected properly to the computer
Launch the command prompt and navigate to the ADT directory unzipped at the step 1. You will have to change directory to ‘sdk\\platform-tools\\’ and run the below command.
adb.exe devices
ADB daemon will be started and it will listen for any device connected to your system. The above command will then list the devices connected.
Still have a problem? Post in our comment section.


No response?
I tried this method but my list of devices attached is blank, despite changing all the paths