Hope you had read my article on how to blur images in MS Paint and today I’ll explain how to blur an image in Microsoft Powerpoint. In Microsoft PowerPoint, you can blur an image completely, and to blur a particular part of an image, you will need to play with a few tricks.
Blur image in Powerpoint
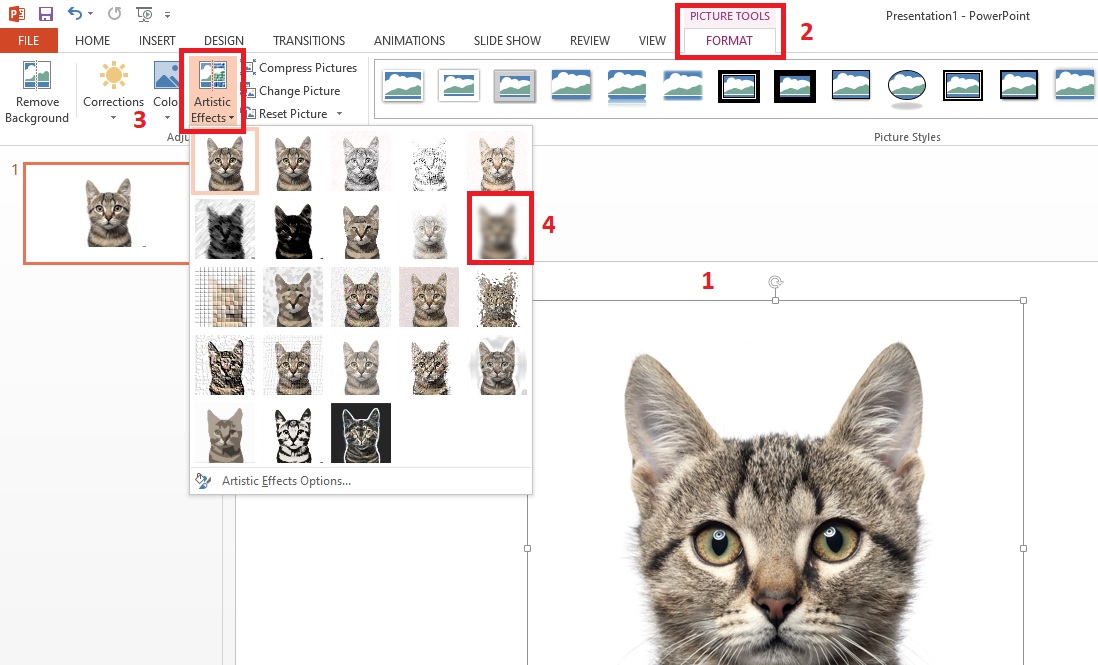
Step 1: Select the image you wish to blur.
Step 2: Click on ‘FORMAT‘ under ‘PICTURE TOOLS‘
Step 3: Click on ‘Artistic Effects‘ from the toolbar.
Step 4: Select the Blur effect as shown in the below image. (In Microsoft Office 2013, the Blur effect is placed at the last in the second row)
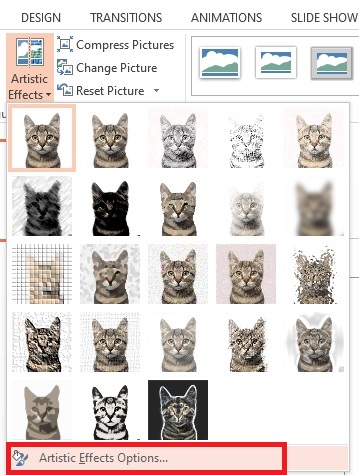
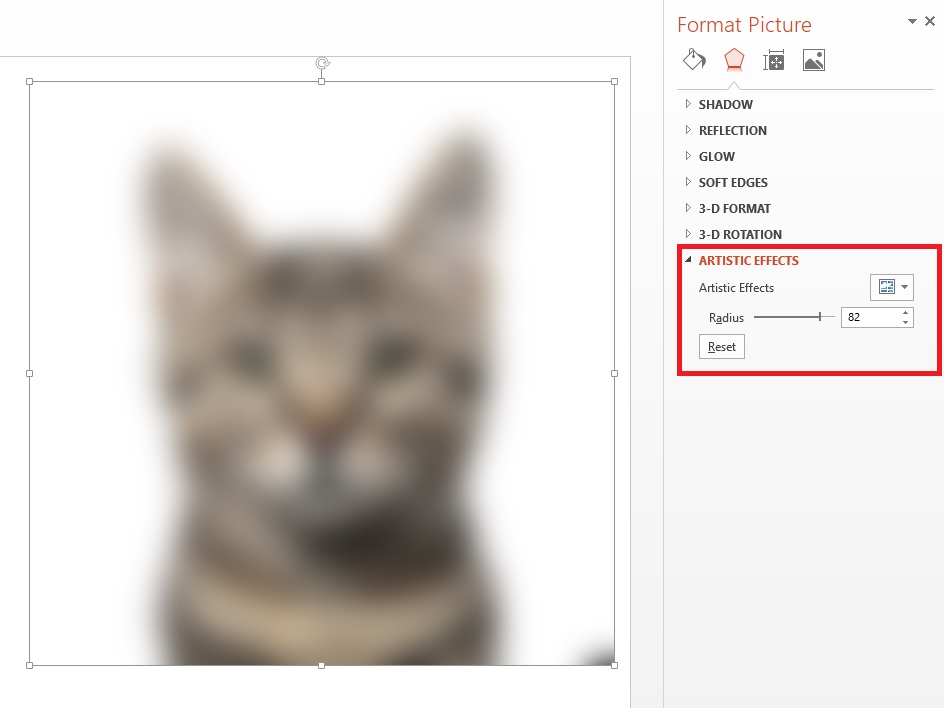
Step 5: To adjust the blur settings, click on the ‘Artistic Effects Options‘ button as shown in the below image.
Step 6: Adjust Radius until you get a better blur effect.
Blur part of an image
Unfortunately, Microsoft PowerPoint does not have a tool to blur only a part of an image. However, a simple trick can help you to do that. Here’s how it’s done.
Step 1: Select the image you would like to blur and hit Ctrl+C to copy it.
Step 2: Hit Ctrl+V to paste the image and position it so that it overlaps the existing image.
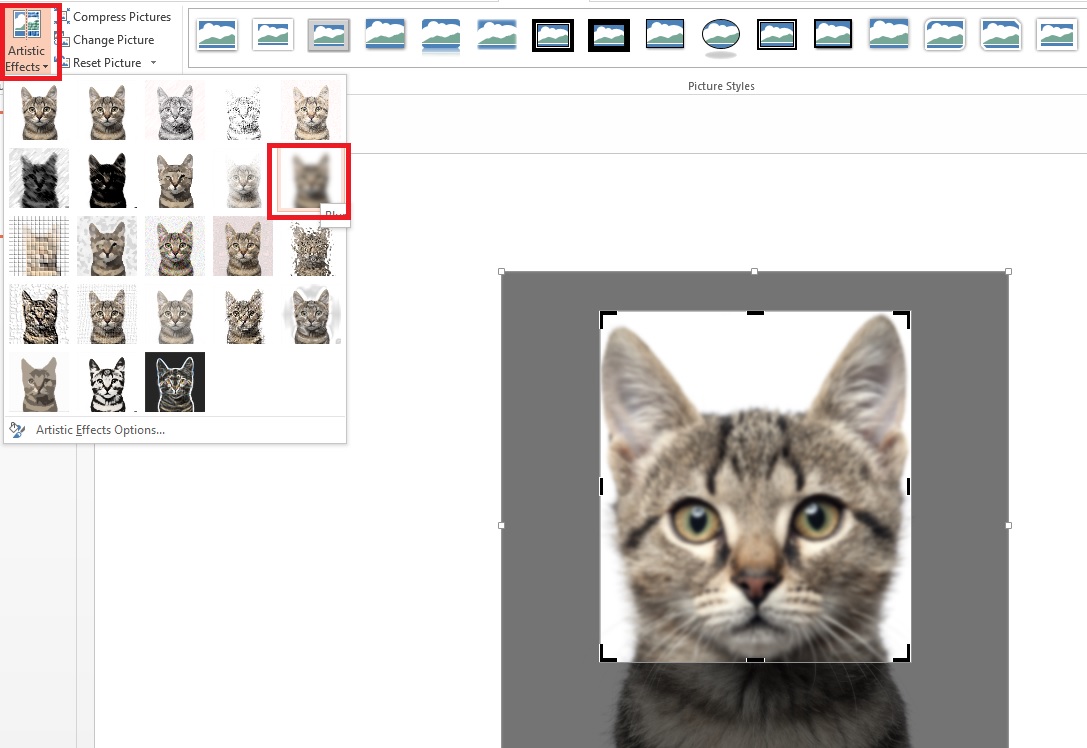
Step 3: Double-click the top image and click on ‘Crop‘ from the toolbar.
Step 4: Crop the top image such that it hides the part of the bottom image that you wish to blur. For example, in our example, I would like to blur the cat’s head. So I had duplicated the image and placed it on top of the existing image. Now, I had to crop the top image such that only the head of the cat is visible. Refer to the below image to understand what I mean.
Step 5: Click on ‘Artistic Effects‘ > Blur effect. Remember, you are applying the effect to the cropped image.
Step 6: To adjust the blur settings, click on the ‘Artistic Effects Options‘ button and adjust the effect Radius as explained earlier.
That’s it! You have now blurred the part of the image in PowerPoint. Do you have any better tricks? Let us know your comments.

