
I was bit excited to have Android Lollipop on my MotoG, though it was late to arrive, I really love it. Soon after updating the device, I tried to tweak it to my liking. Android Lollipop has loads of awesomeness and some interesting improvements to the existing features as well. One of the improvement made to Google keyboard was the ability to add numbers row, but enabling it needs a bit of digging through the settings.
Note: If you are using SwiftKey Keyboard, then don’t worry I have steps for that as well.
Also Read: If you are new to Android 5.0 and finding tough in Understanding Priority, None modes, then here’s a simple guide.
How to add numbers row to Google keyboard?
Follow the below steps to add numbers row to Google keyboard.
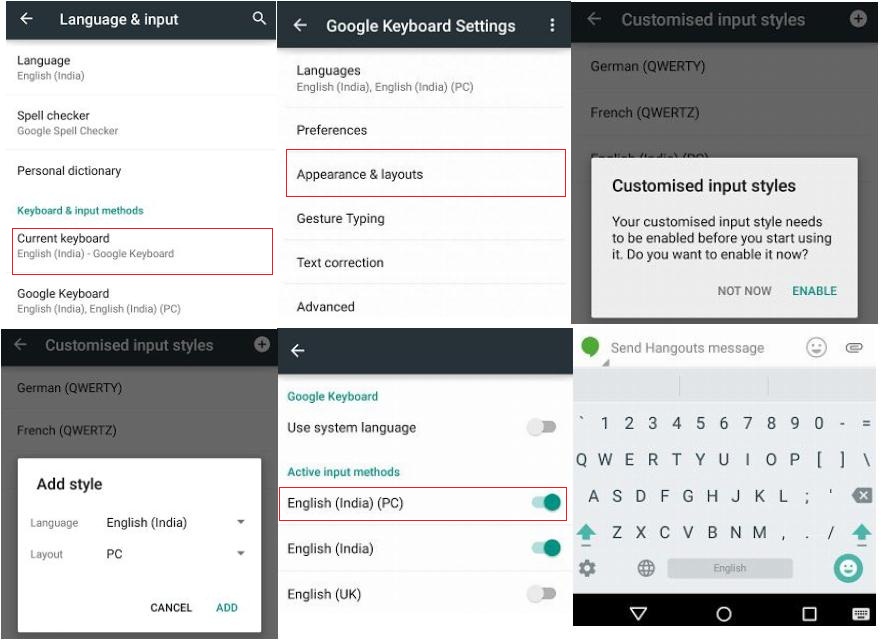
- Go to Settings and tap “Language and input“
- Tap “Google keyboard“
- Now tap “Appearance & layouts” and “Customized input styles“
- Tap plus (+) button and add a new style. Choose language of your choice and select “PC” under layout.
- You have to enable the chosen customized input style. To do that tap “ENABLE”
- Make sure your input style is active under “Active input methods“
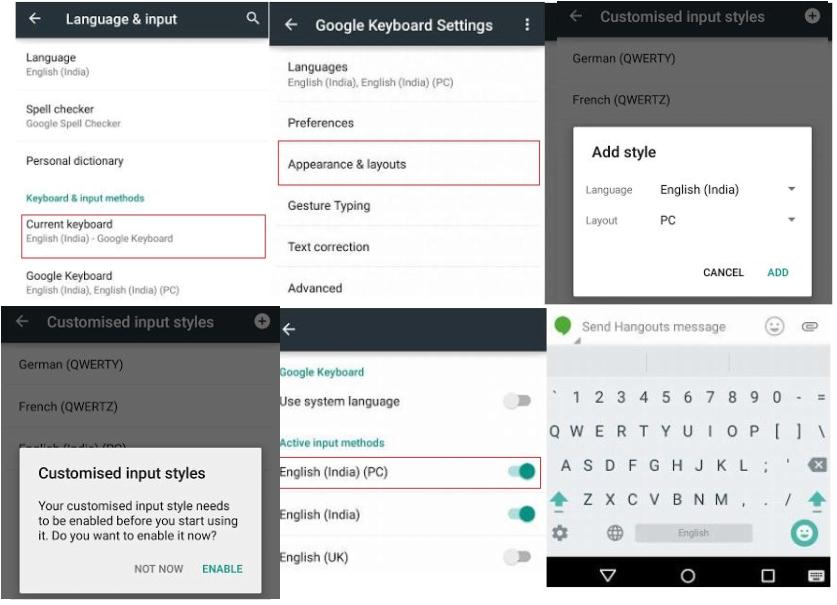
That’s it. The new layout is ready and all you need is to tap the globe icon to see the numbers row in the keyboard.
How to add numbers row in SwiftKey Keyboard?
- Go to Settings and tap “Language and input“
- Tap “SwiftKey Keyboard“
- Tap “Layout“
- Check “Numbers row“

That’s it. You should see numbers row in your favorite SwiftKey keyboard.
