One of the recent improvements in the Facebook page is that it allows you to add tabs to your Facebook sidebar menu, like the one shown on this article. I really had a tough time in adding few tabs for the techglimpse fan page. Interestingly during my search for adding tabs, i came across an awesome application called “Static HTML: iframe tabs“.
Static HTML makes it simple to build custom iframe tabs. Like Static FBML, but for iframes. Below screenshot shows my requirement for adding few tabs to my Facebook fan page.

Below are the steps to add tabs to your page:
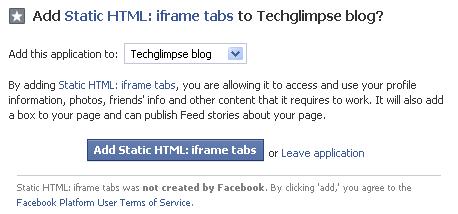
Step 1 : Install the Static HTML: iframe tabs application.
Step 2: Grant permission and install the application.

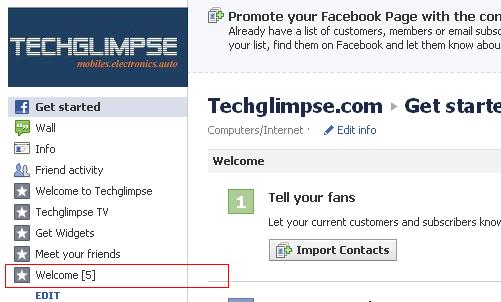
After installing the application, you can find the new tab added to the sidebar of your Facebook page as shown in the below figure. In my case, its “Welcome [5]”. I mean, its my 5th tab.

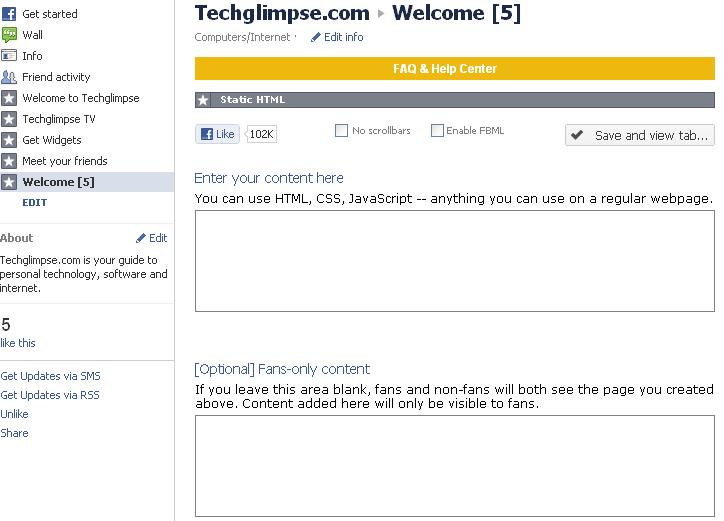
Step 3: The next step, is to add the content for the tab. Click the newly created tab to add the contents. You can find the edit window displayed on the right panel of your page as shown below.

Step 4: You can add the contents in the text box provided under “Enter your content here”. You can use HTML, CSS, Javascript, anything that you normally use on your regular webpage. All you need is few basics about creating a webpage using HTML, CSS and javascript. For example, i want an image to be displayed when the tab is clicked. The below snapshot shows how to add an image.

Note: You can actually copy and paste few snippet of html code from your webpage. But the width of the content will be limited to 520 pixels.
When you are done, click the “Save and view tab” button on the right corner of the edit window. That’s it you are done with your tab.

May be you can follow my another tutorial on “How to change the name of the tab in the Facebook page?“.
If you find this tutorial useful, then I would like you to be fan on my Facebook page here

